When we completed our the bathroom addition (which included a large closet) in our CT home, I debated between the Elfa closet system and IKEA Pax closet system. We ended up installing an IKEA PAX closet system which I LOVED!
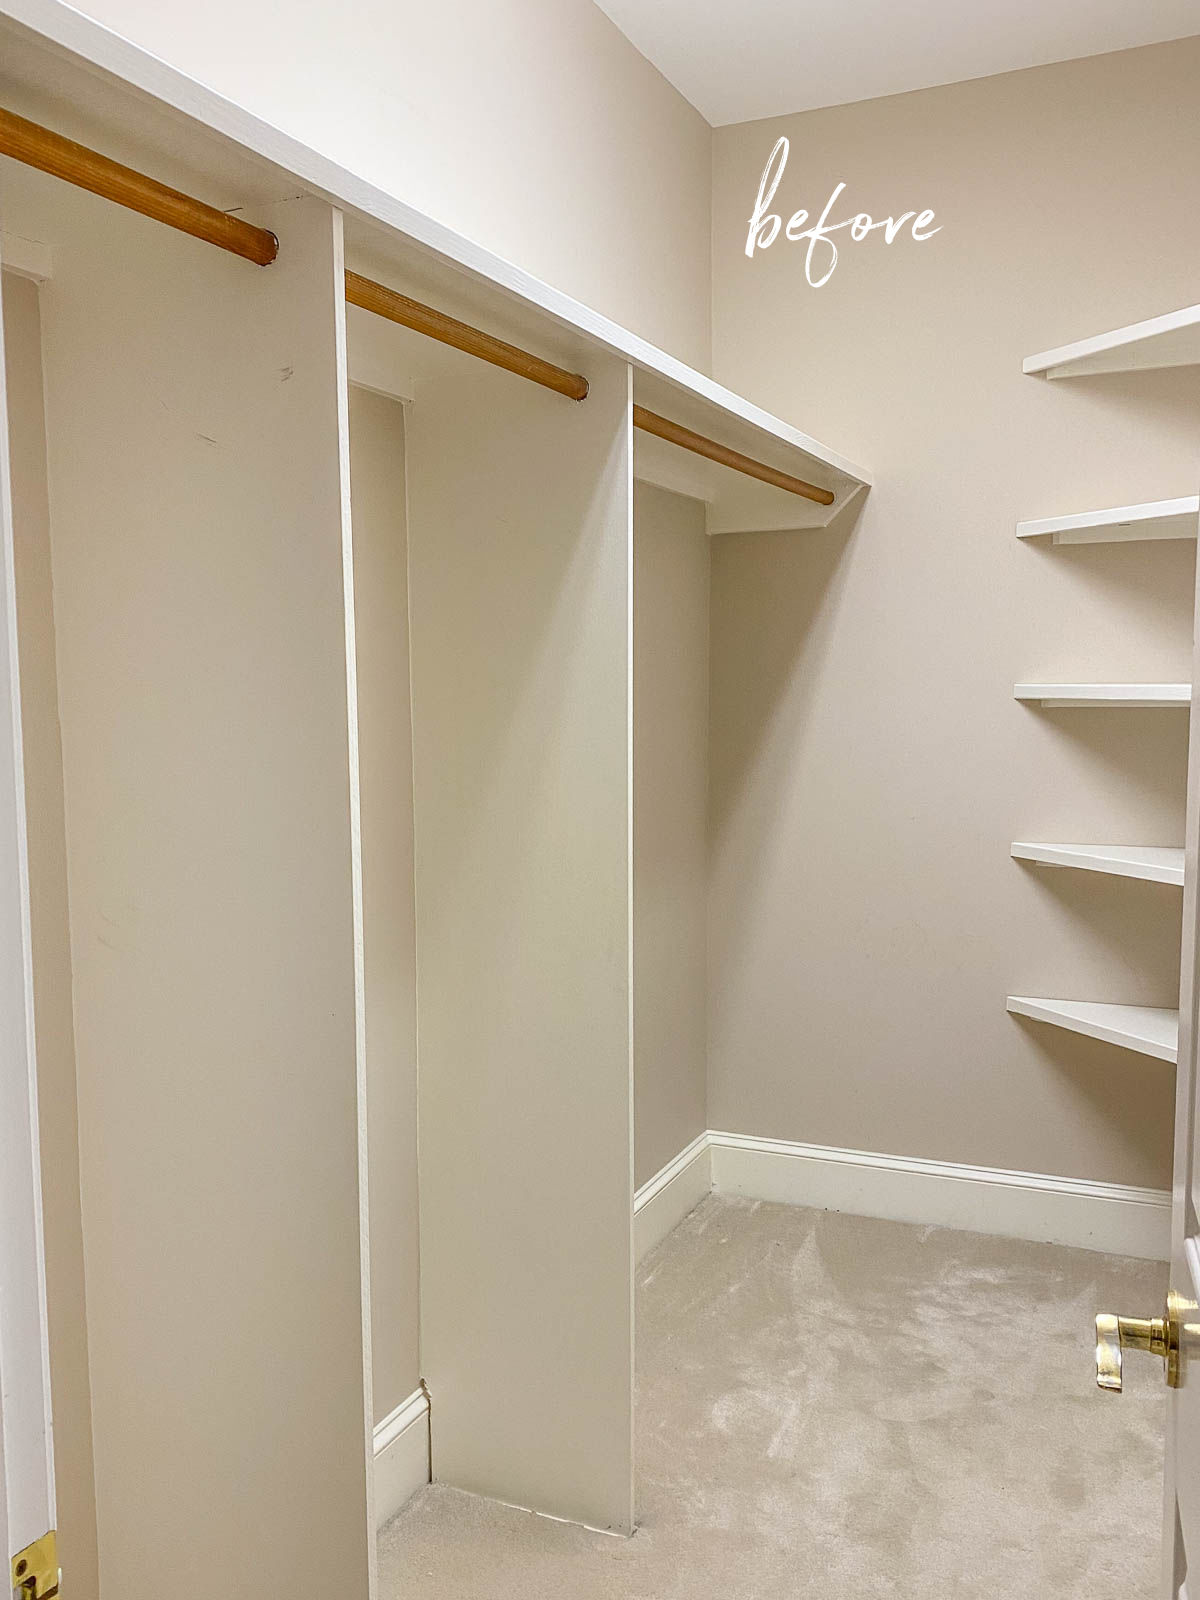
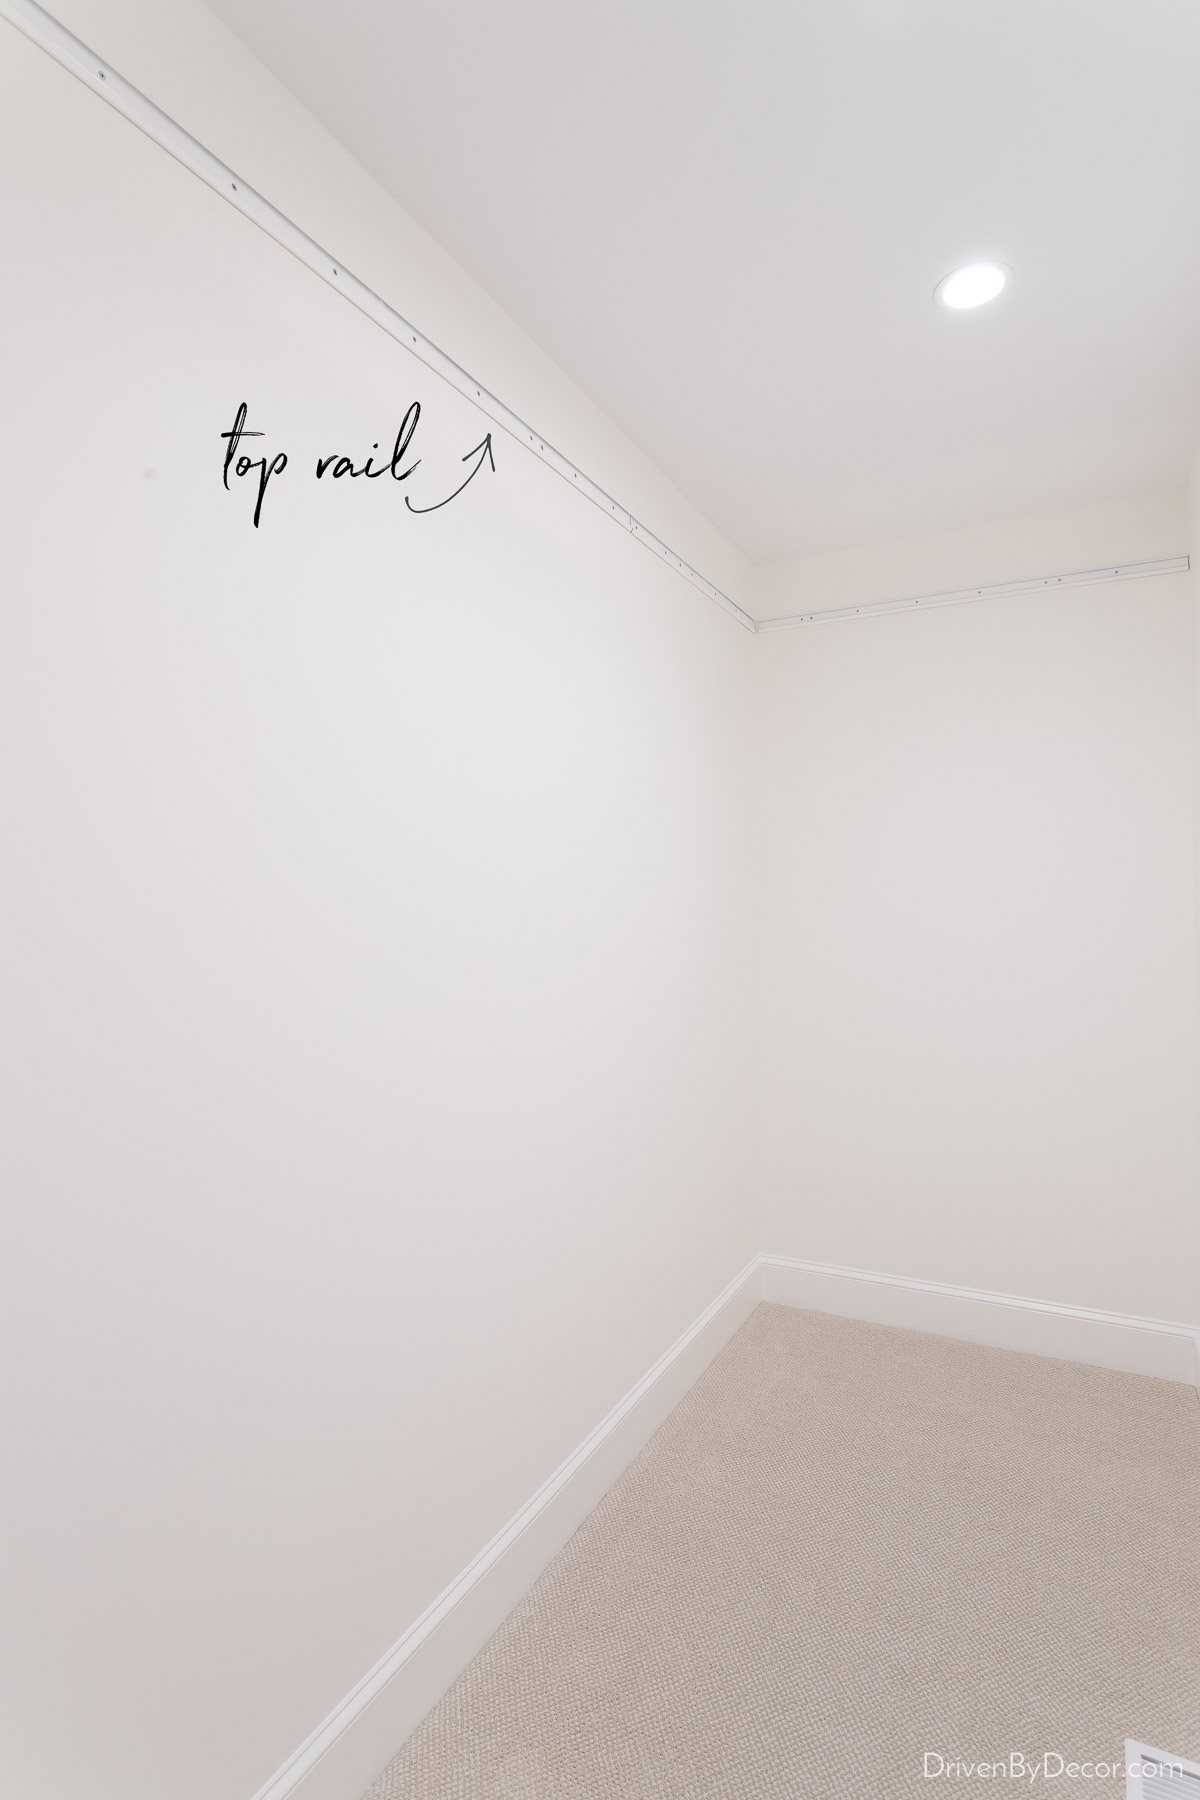
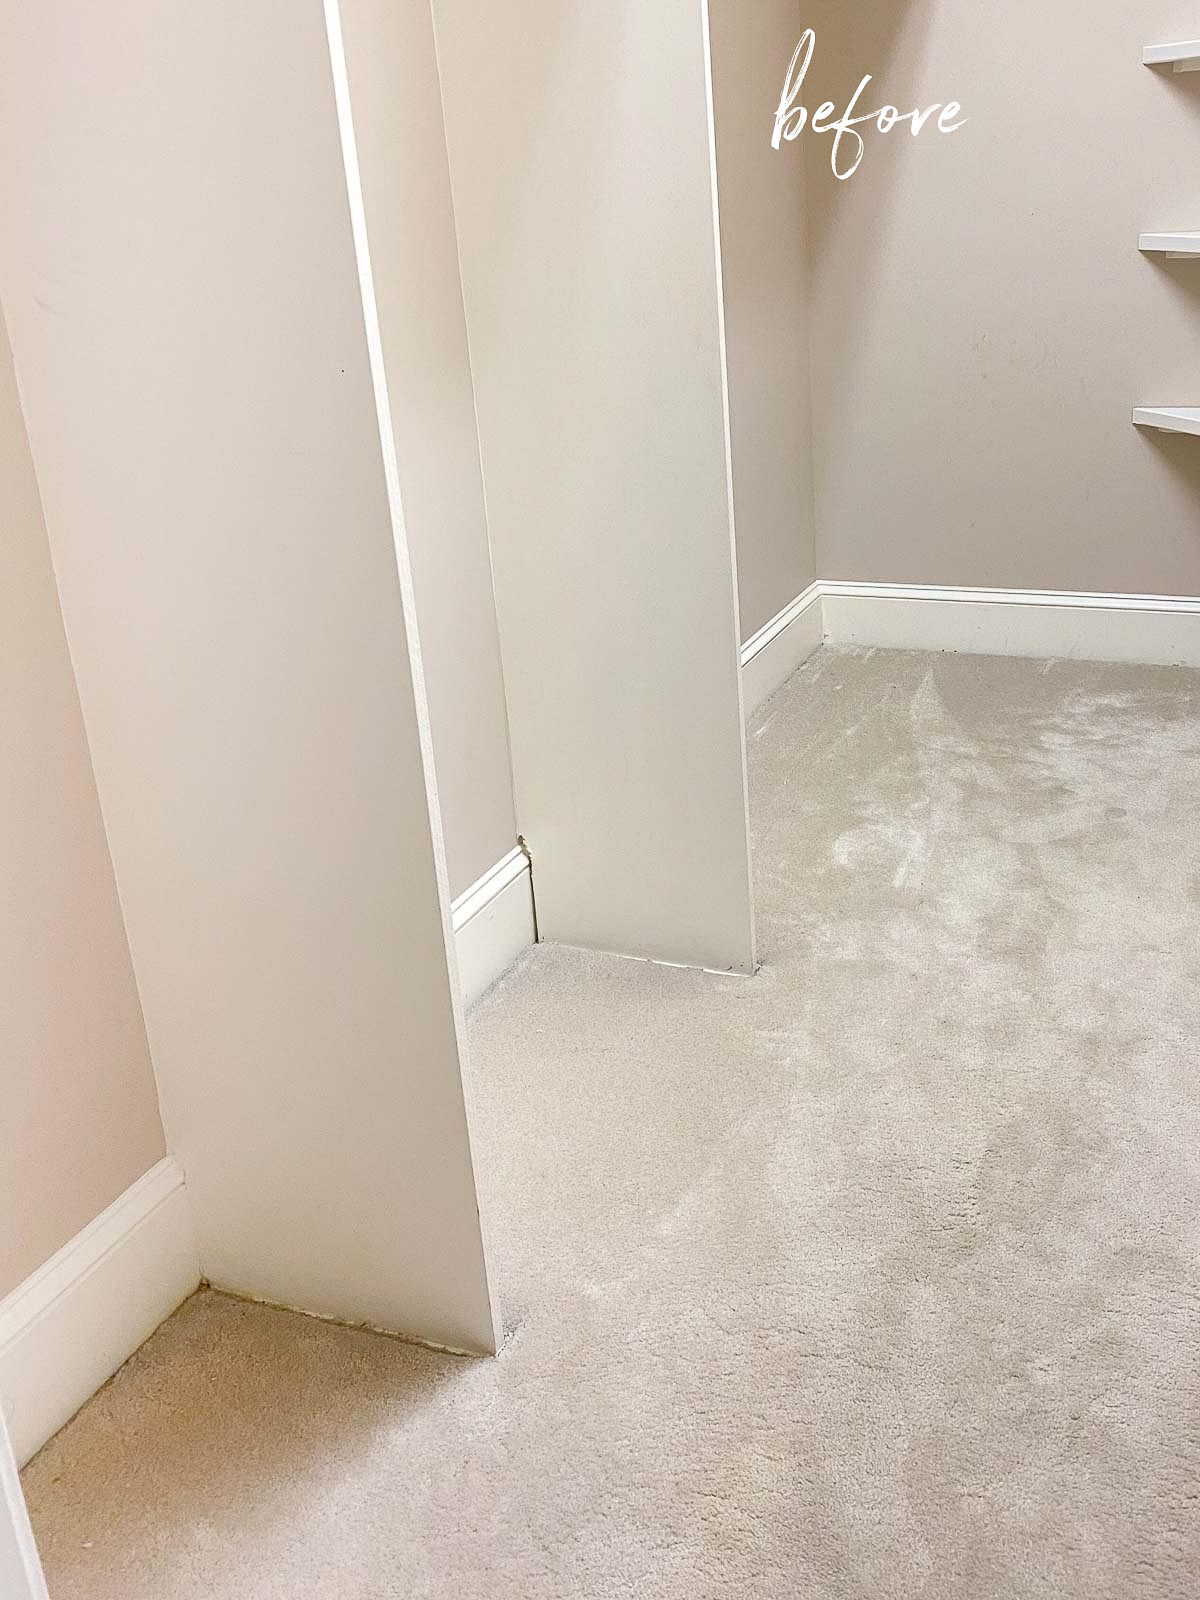
Fast forward a few years and we’re in a “new” home with a closet in major need of a makeover. While there was a lot of wasted space, our closet is a pretty decent size with loads of potential. Originally it consisted of one long wall with a single rod for hanging clothes plus some awkward corner shelves that weren’t big enough to really be of much use:
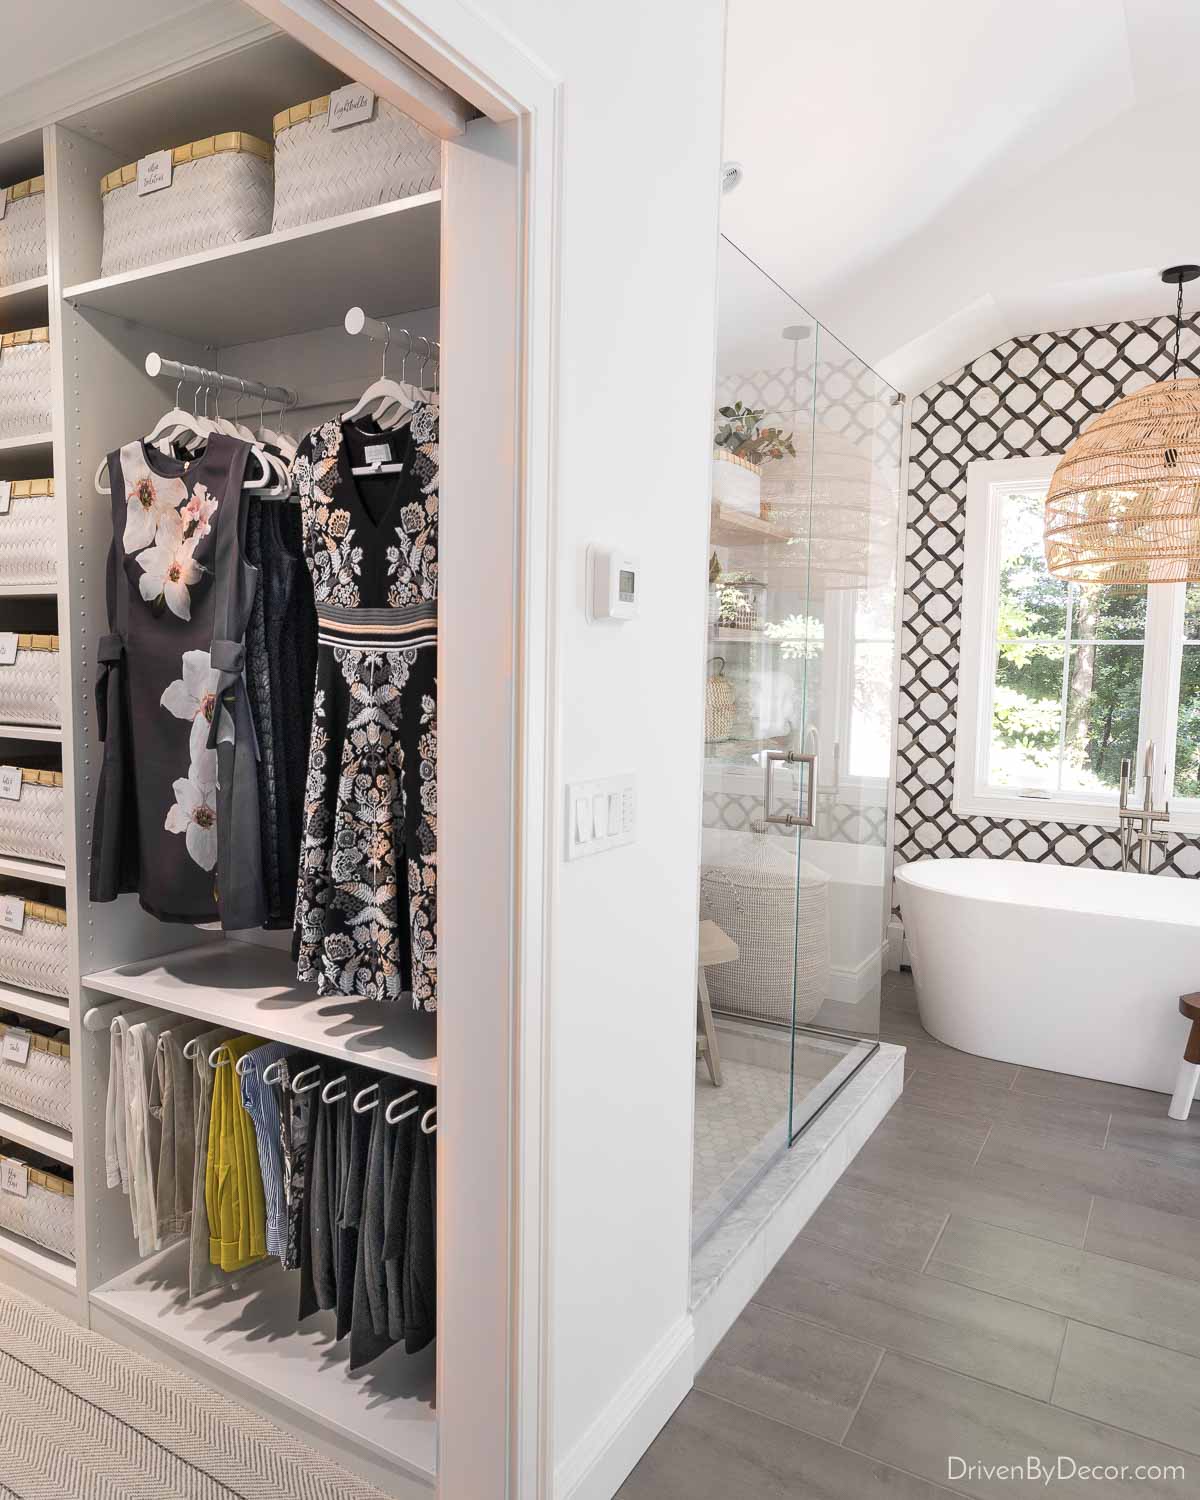
My goal in remodeling it was to maximize the use of its 9′ height, adding upper storage, tiered hanging space, and storage space for shoes and my jewelry. After considering several closet systems, we decided that The Container Store’s Elfa closet system was the best fit for our space.
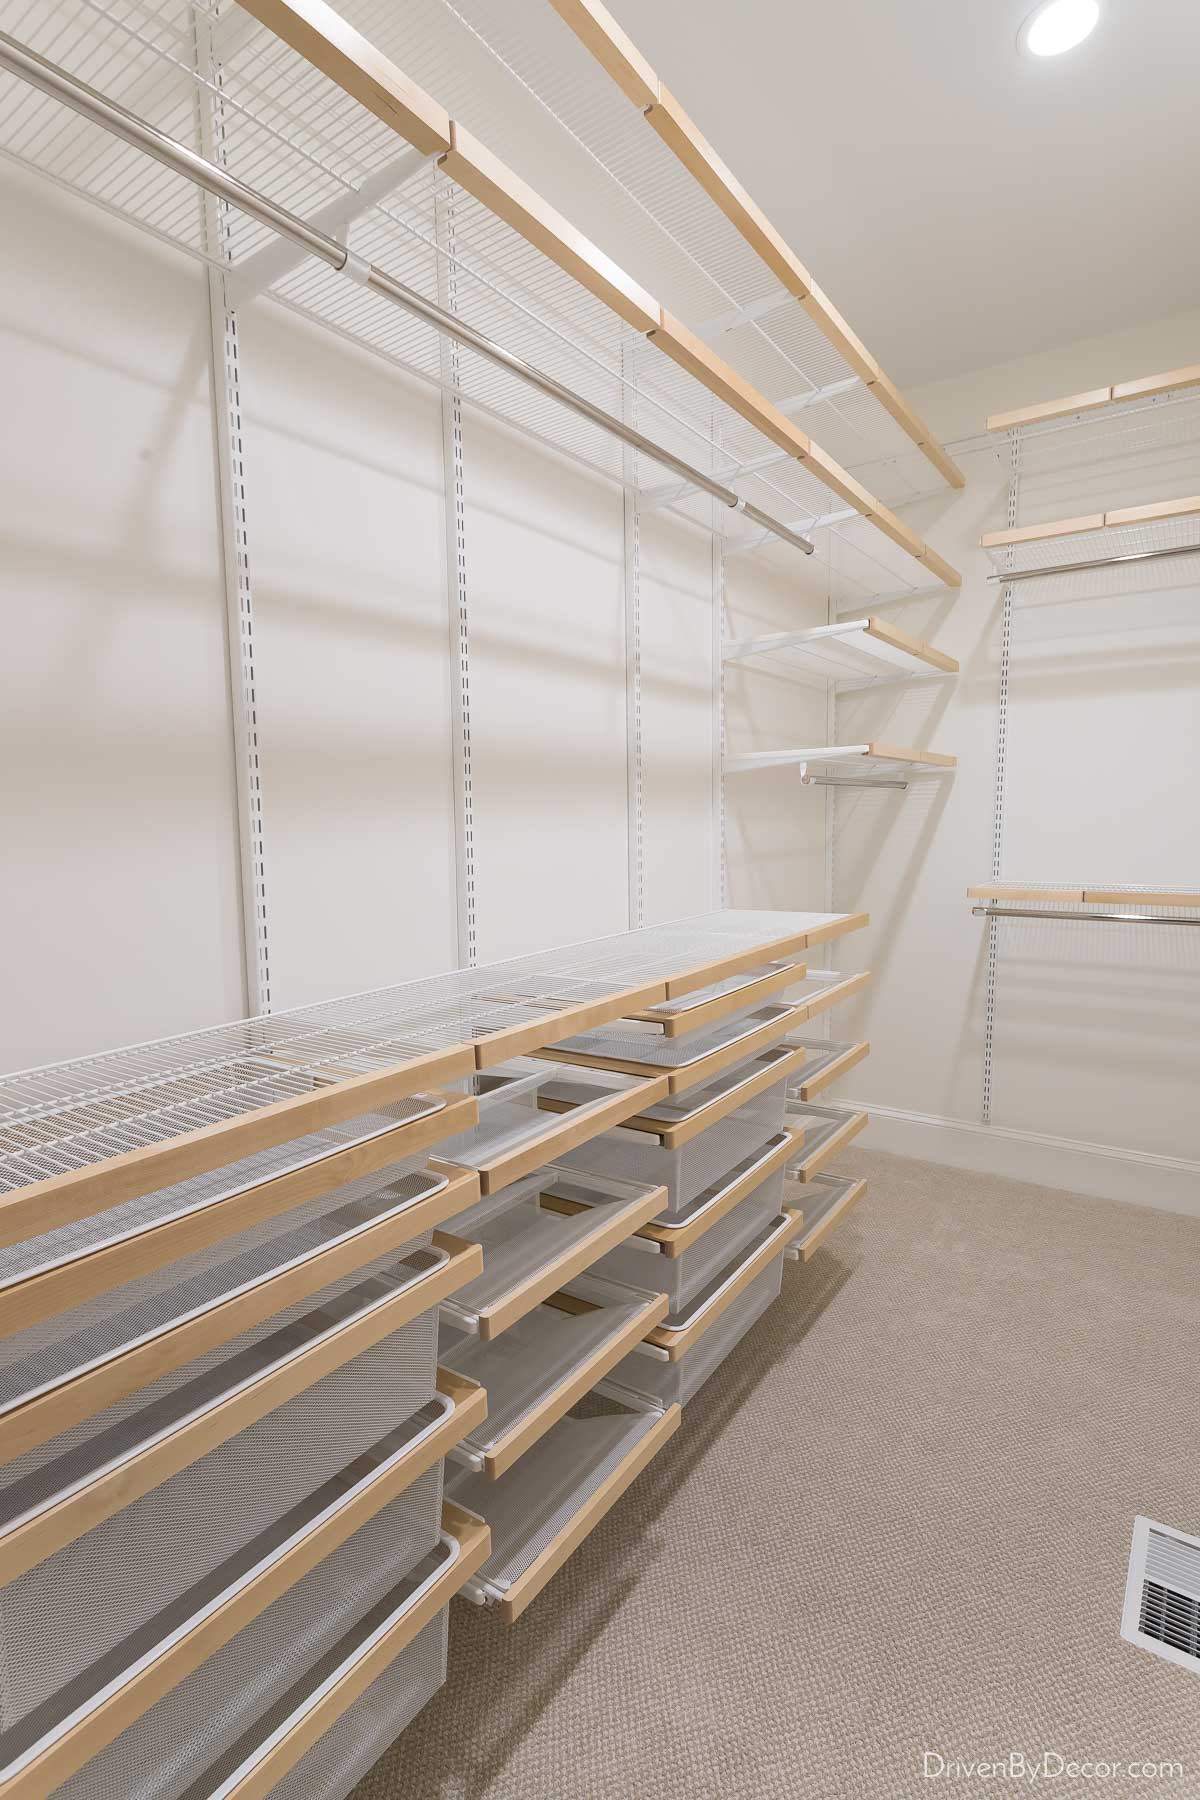
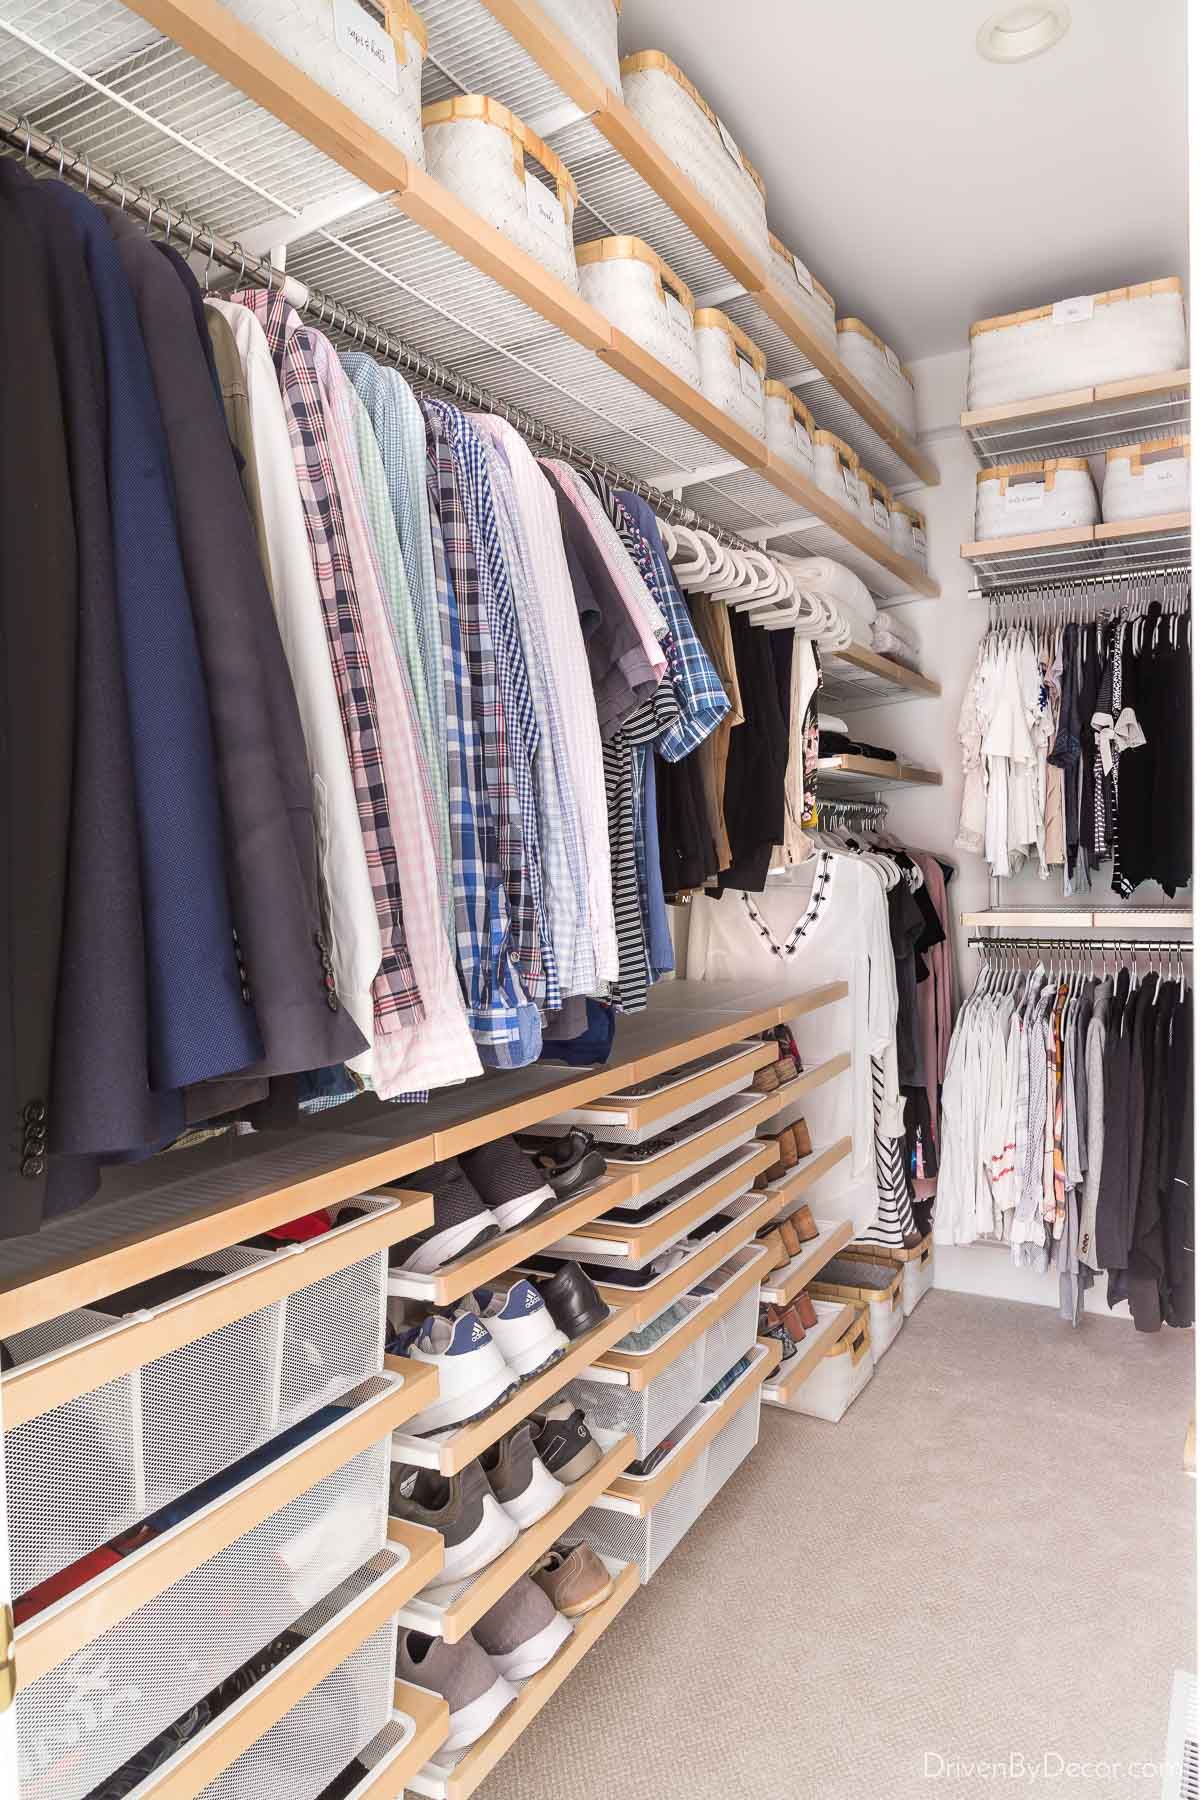
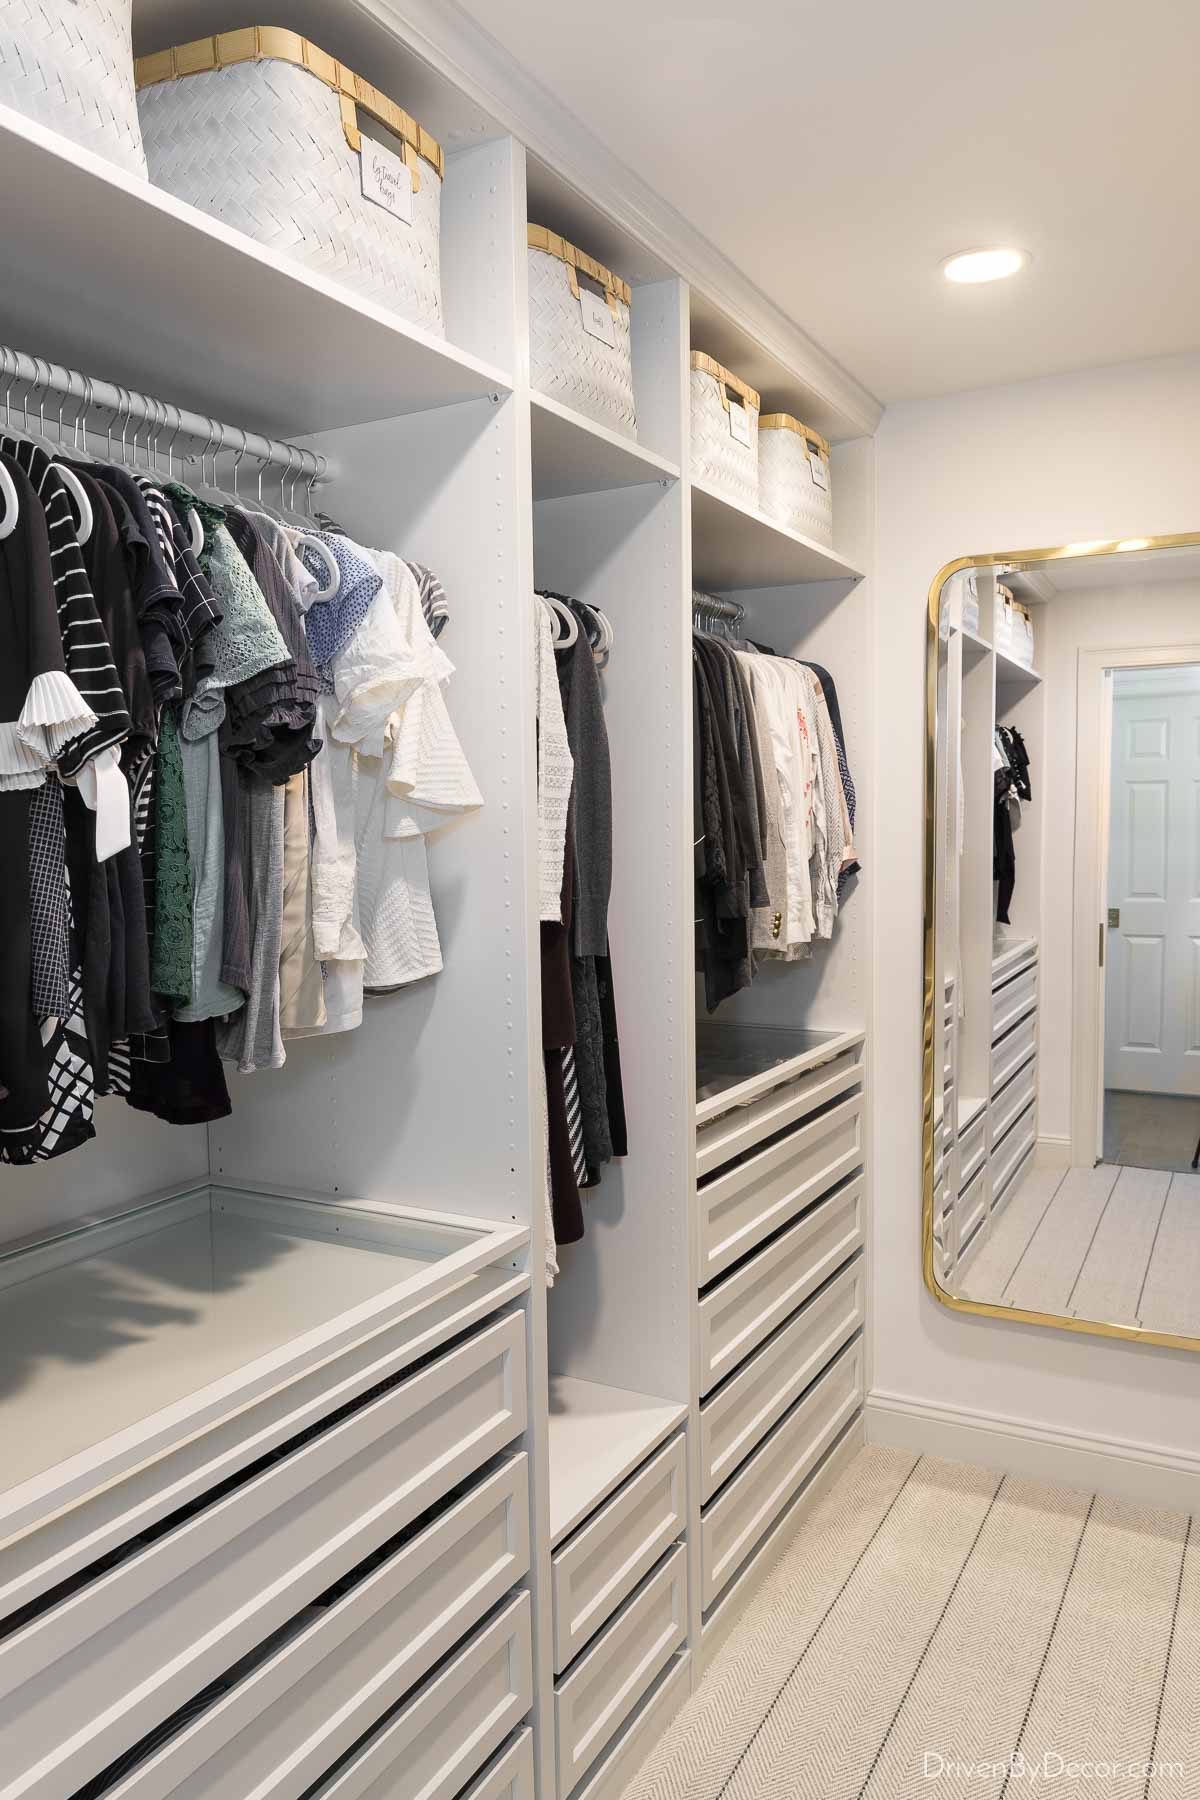
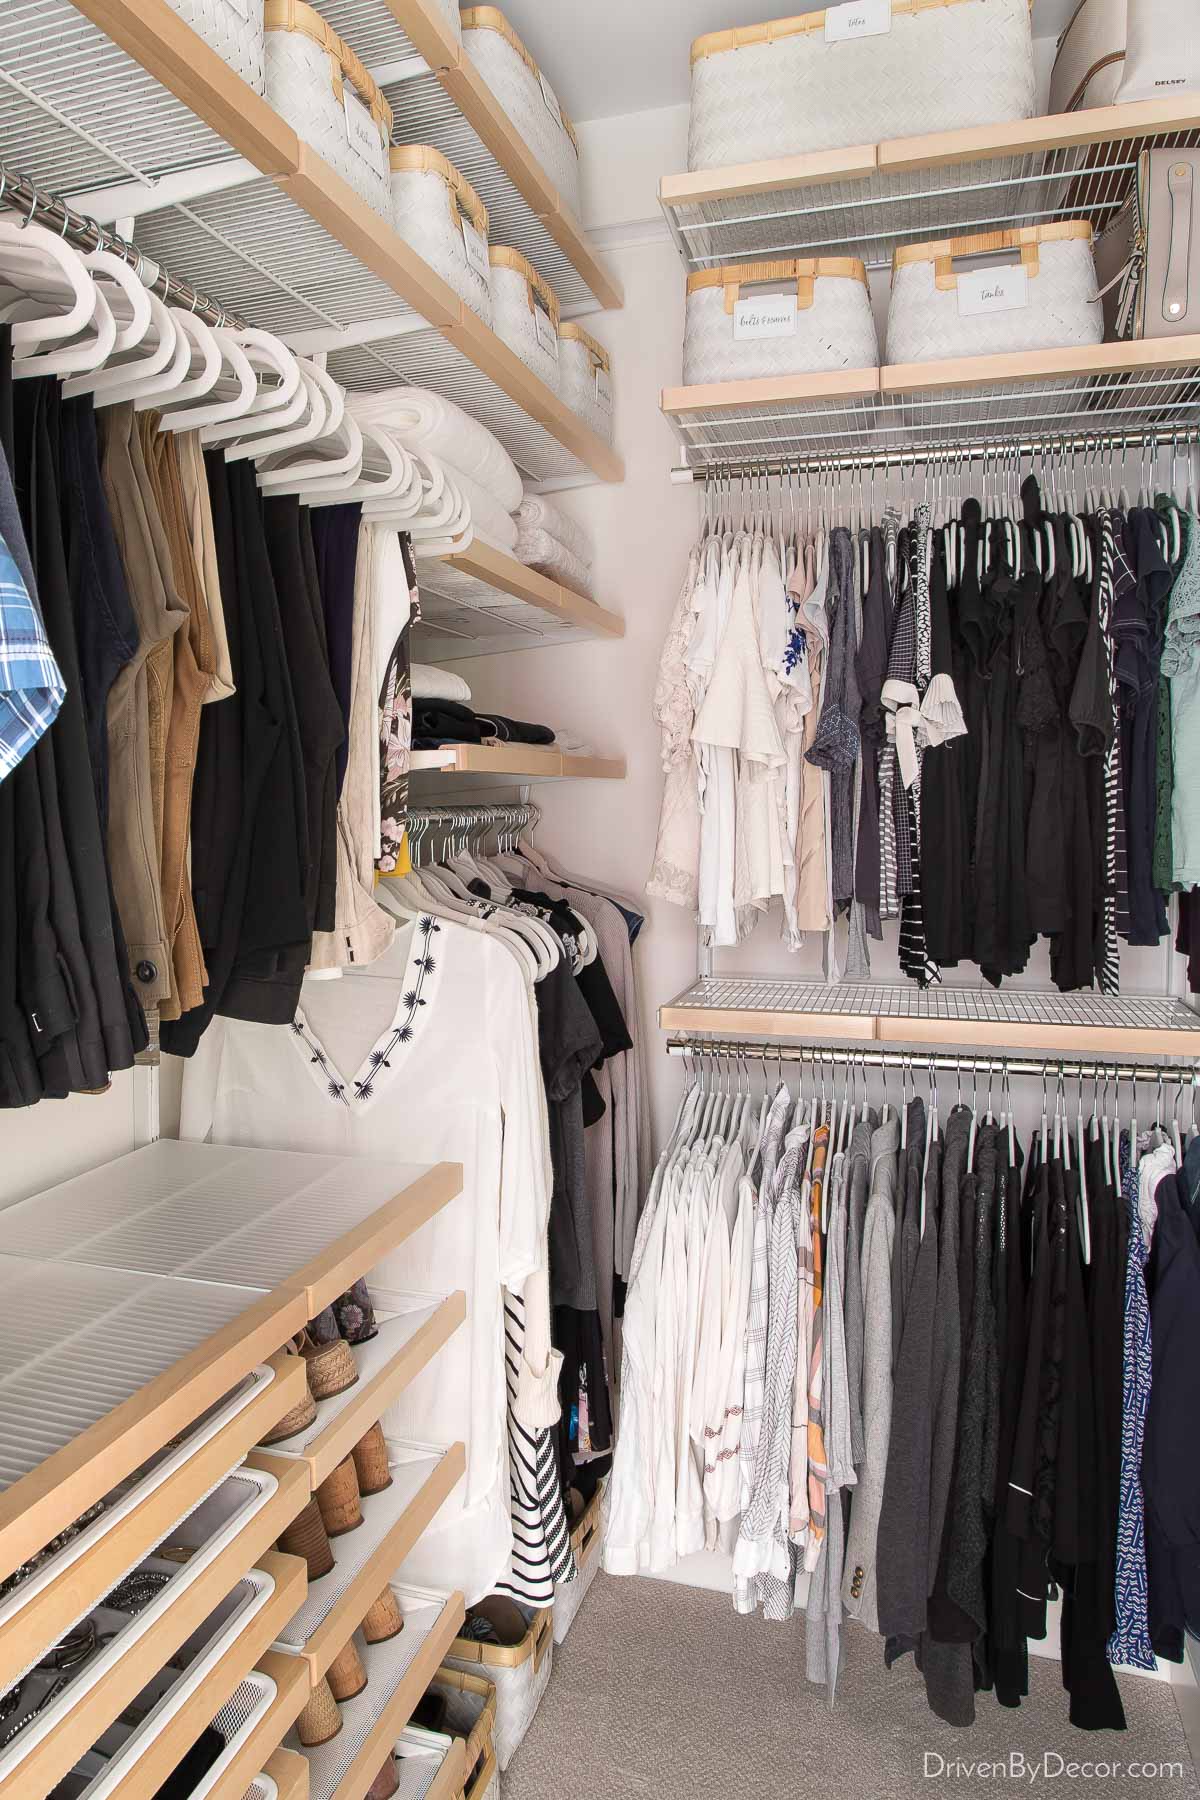
Wow! The amount of extra storage space we ended up being able to pack into our closet is pretty insane:
I’m going to walk you through the process of designing and installing an Elfa closet system, share my thoughts on the pros and cons of it, and give cost details so you can decide if the Elfa system is a good fit for you. I’ll also share details of how it compares to the IKEA PAX system that we used previously and why we chose the Elfa closet system this time.
Elfa Closet System Design
The Container Store has several options for designing your Elfa closet system. One option is to design it yourself online using {this closet design tool}. After entering in your closet measurements you can build it out to fit your exact needs and see what the total cost would be.
The tool to design it yourself is super easy to use but if you need help you can get it from one of their closet designers. You can make a virtual appointment with a closet designer {here} or schedule an in-store appointment {here}.
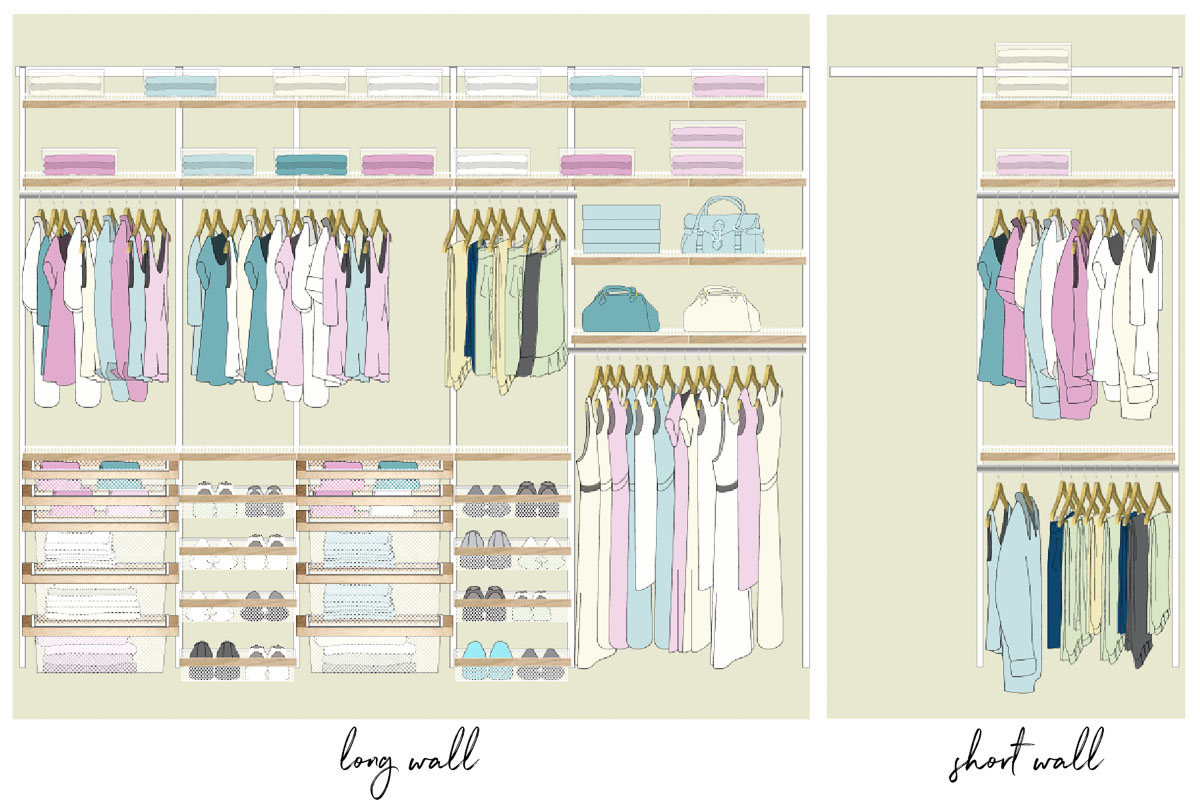
Since I’m two hours away from the nearest store and was already familiar with Elfa, I worked with a closet designer (Jenna from the Raleigh store – she was great!) entirely online. I simply gave her my closet measurements and told her what I had in mind (how much drawer space, long vs. short hanging space, etc. I wanted) and she came up with a detailed plan. She sent me several renderings of our closet layout including an overhead view, diagram showing the proposed design of each wall,
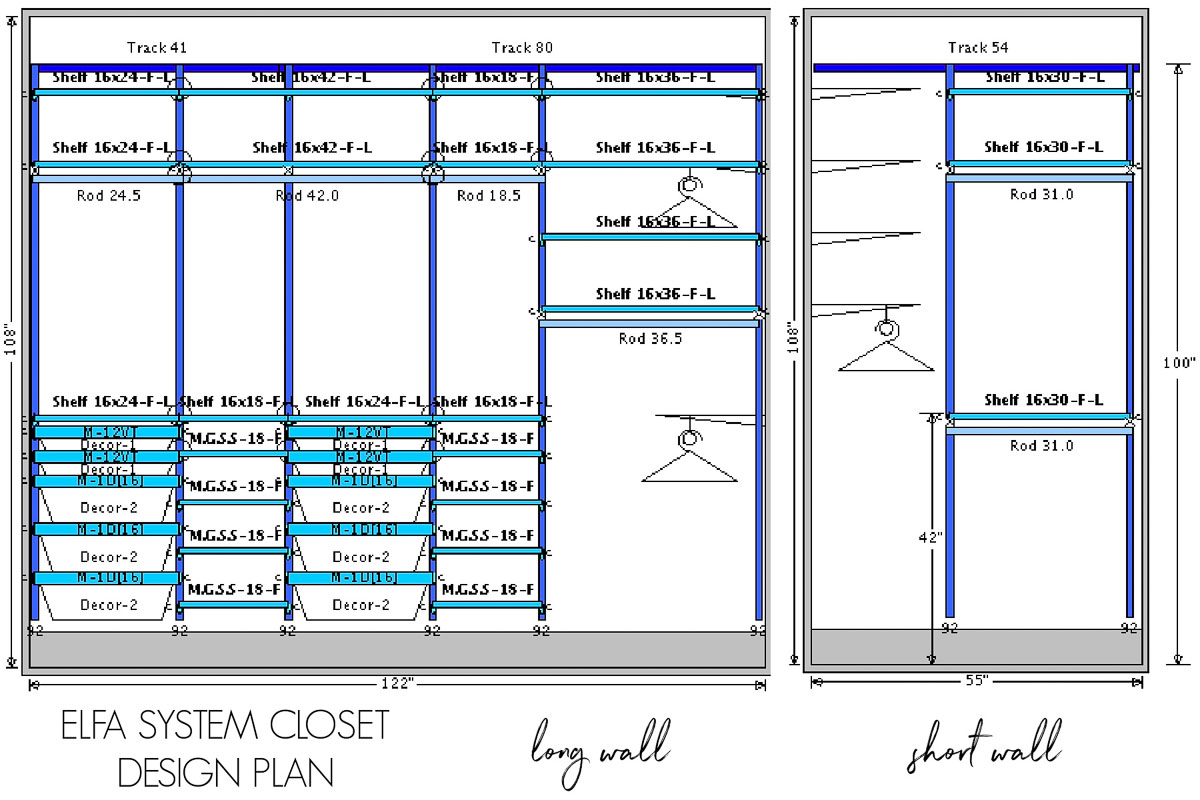
and a visual rendering of what it would look like:
We had several back and forth emails tweaking the design until it was exactly what I wanted. Once I finalized our design, purchasing our Elfa system was as simple as clicking an “add to cart” button provided by the closet designer that automatically adds all of the Elfa components that you need to create your plan into your online shopping cart.
You can elect to pick up your Elfa components at the store, have them shipped, or have them delivered (if you’re within delivery range of a store). We elected to do curbside pick-up once everything was in stock which worked beautifully. We simply backed up into a curbside spot, called to tell them we were there, and they brought everything out and loaded our car up for us.
Elfa Closet Installation
We elected to DIY the installation of our Elfa system to save money because The Container Store’s installation estimate was pricey (more on the cost of our Elfa system later)! The way that the Elfa system works is that the top track is the only component physically attached to the closet wall – everything else simply hangs from that track. So once you get the top track hung, the rest of the installation process is tool-free.
Hanging the top track was a two person job so Jeff and I did it together but once that track was in place, I finished the rest of the closet installation on my own. It took a total of about 2 hours for us to install the track (keep reading for why it took that long) and about 4-5 hours for me to do the rest of the installation.
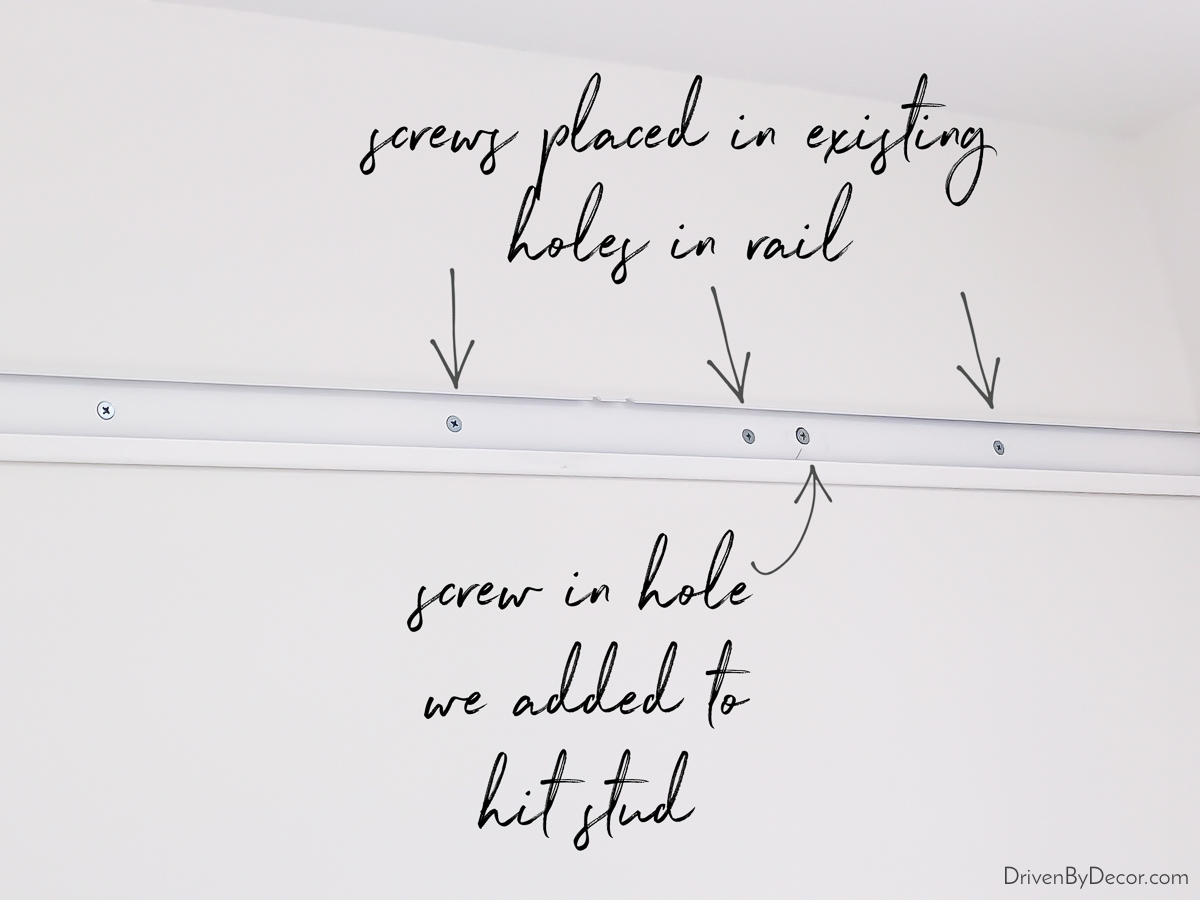
The only installation issue we encountered was in securing the top track to the wall. When you order your Elfa system for DIY installation, all of the tracks and standards are pre-cut to fit your closet which is awesome except for one little issue. The top track is secured to the wall via anchors (if you hit drywall) or screws (if you hit studs) through pre-drilled holes spaced every 8″ along the track. The problem is that since studs are typically spaced every 16″, with a pre-cut top track, you’re either going to hit all studs or all drywall. We of course hit all drywall.
Since the ENTIRE weight of the Elfa system hangs from this one top track, that sucker has GOT to be secure and we simply weren’t comfortable with not having any screws securing it into studs (especially since the drywall anchors they included weren’t the best). We ended up using a metal drill bit to drill some additional holes through the top track to secure each track to studs in two places (FYI this was our own solution, not the recommendation of The Container Store).
In the future, I’ll request that they don’t pre-cut our top track – this way we can cut it on our own so that the holes in the rail line up with our closet studs (which is exactly what the paid installers do).
Note: They have since changed the design of the top track of the ELFA system, but it’s still fairly similar. I used it recently to install a smaller closet system that you can see in my post on these closet organization ideas.
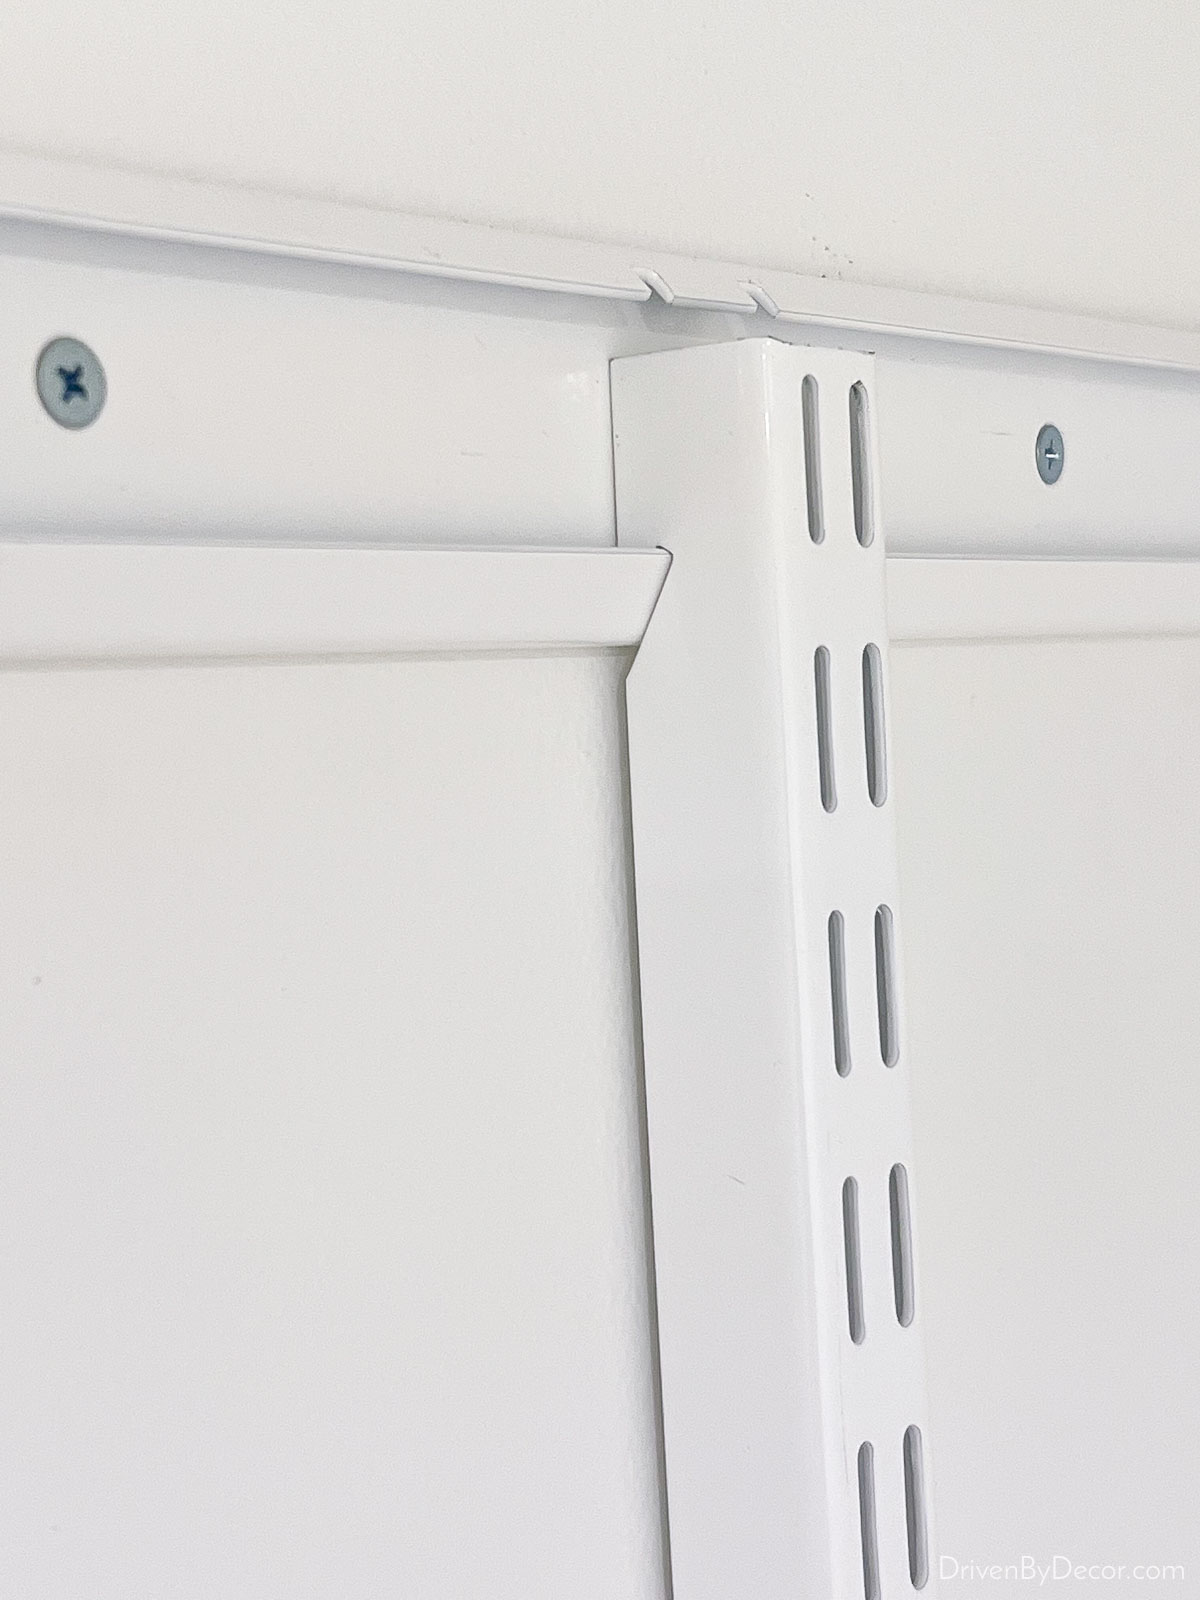
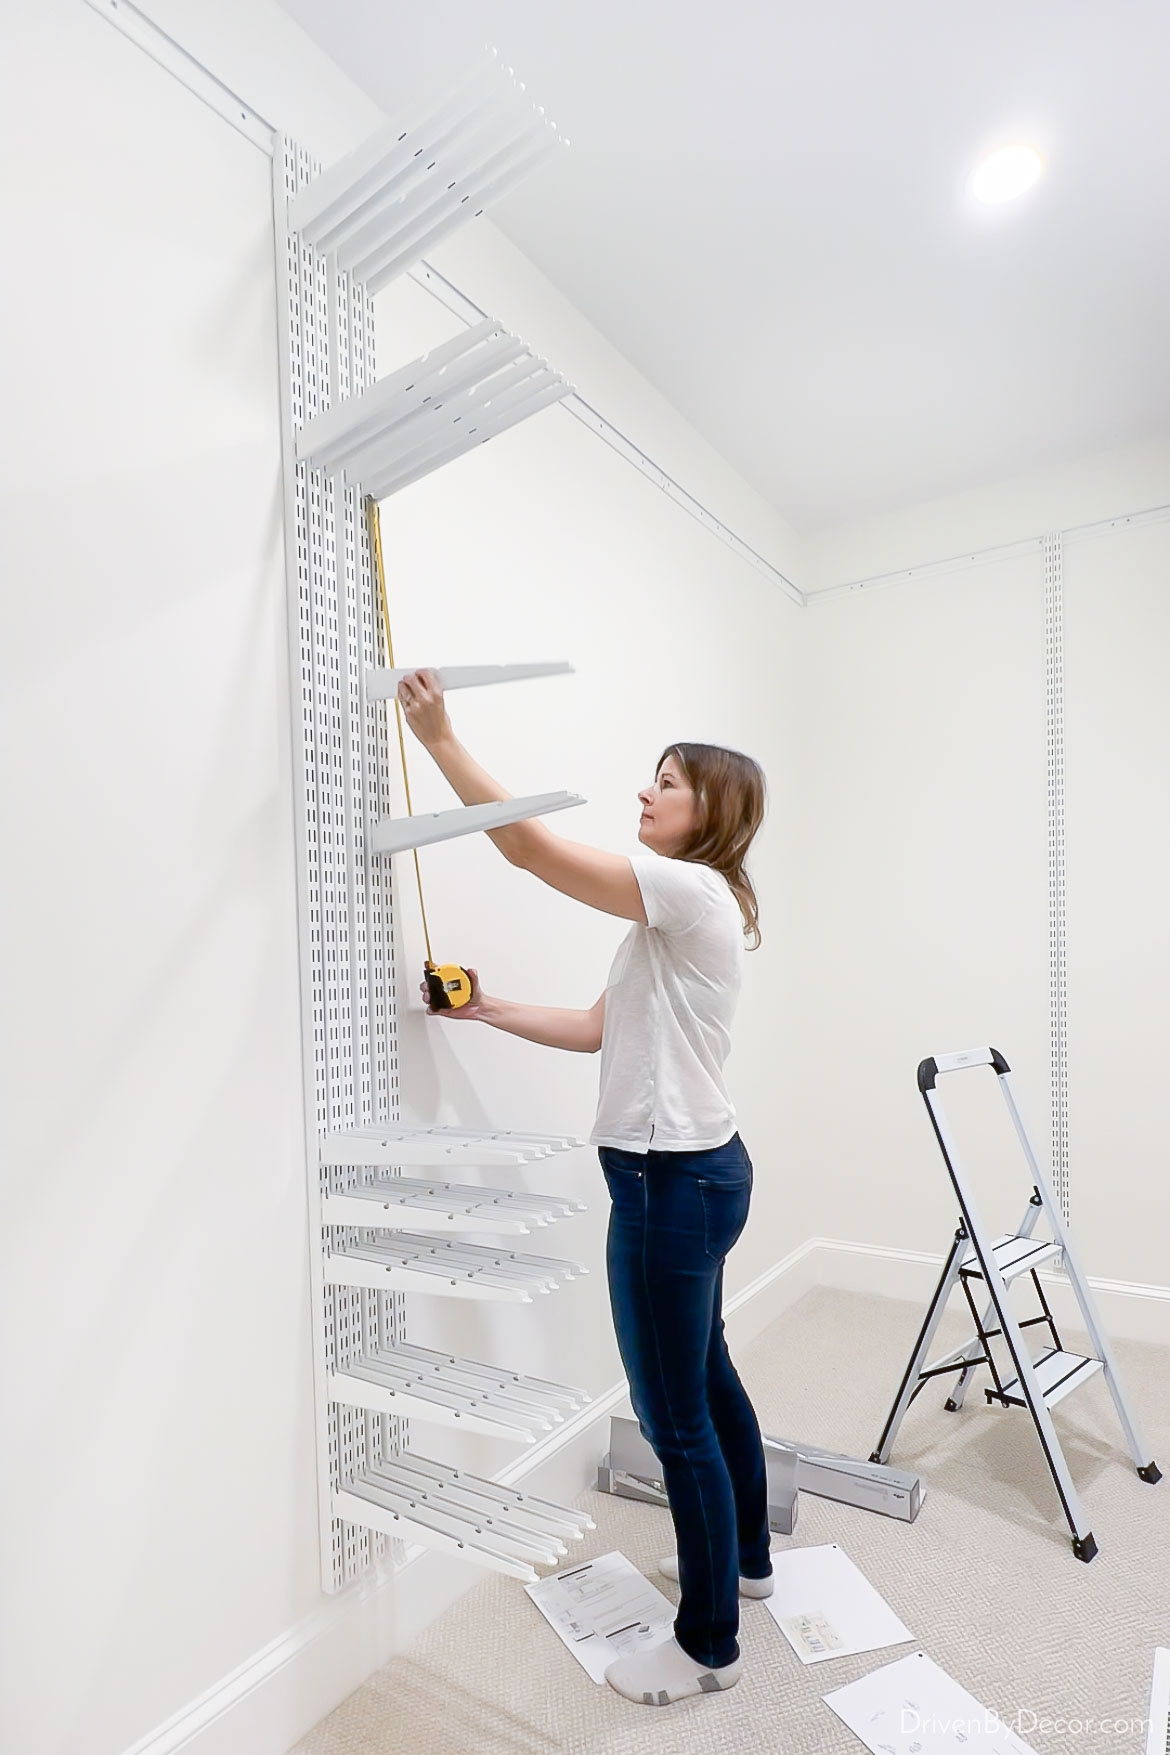
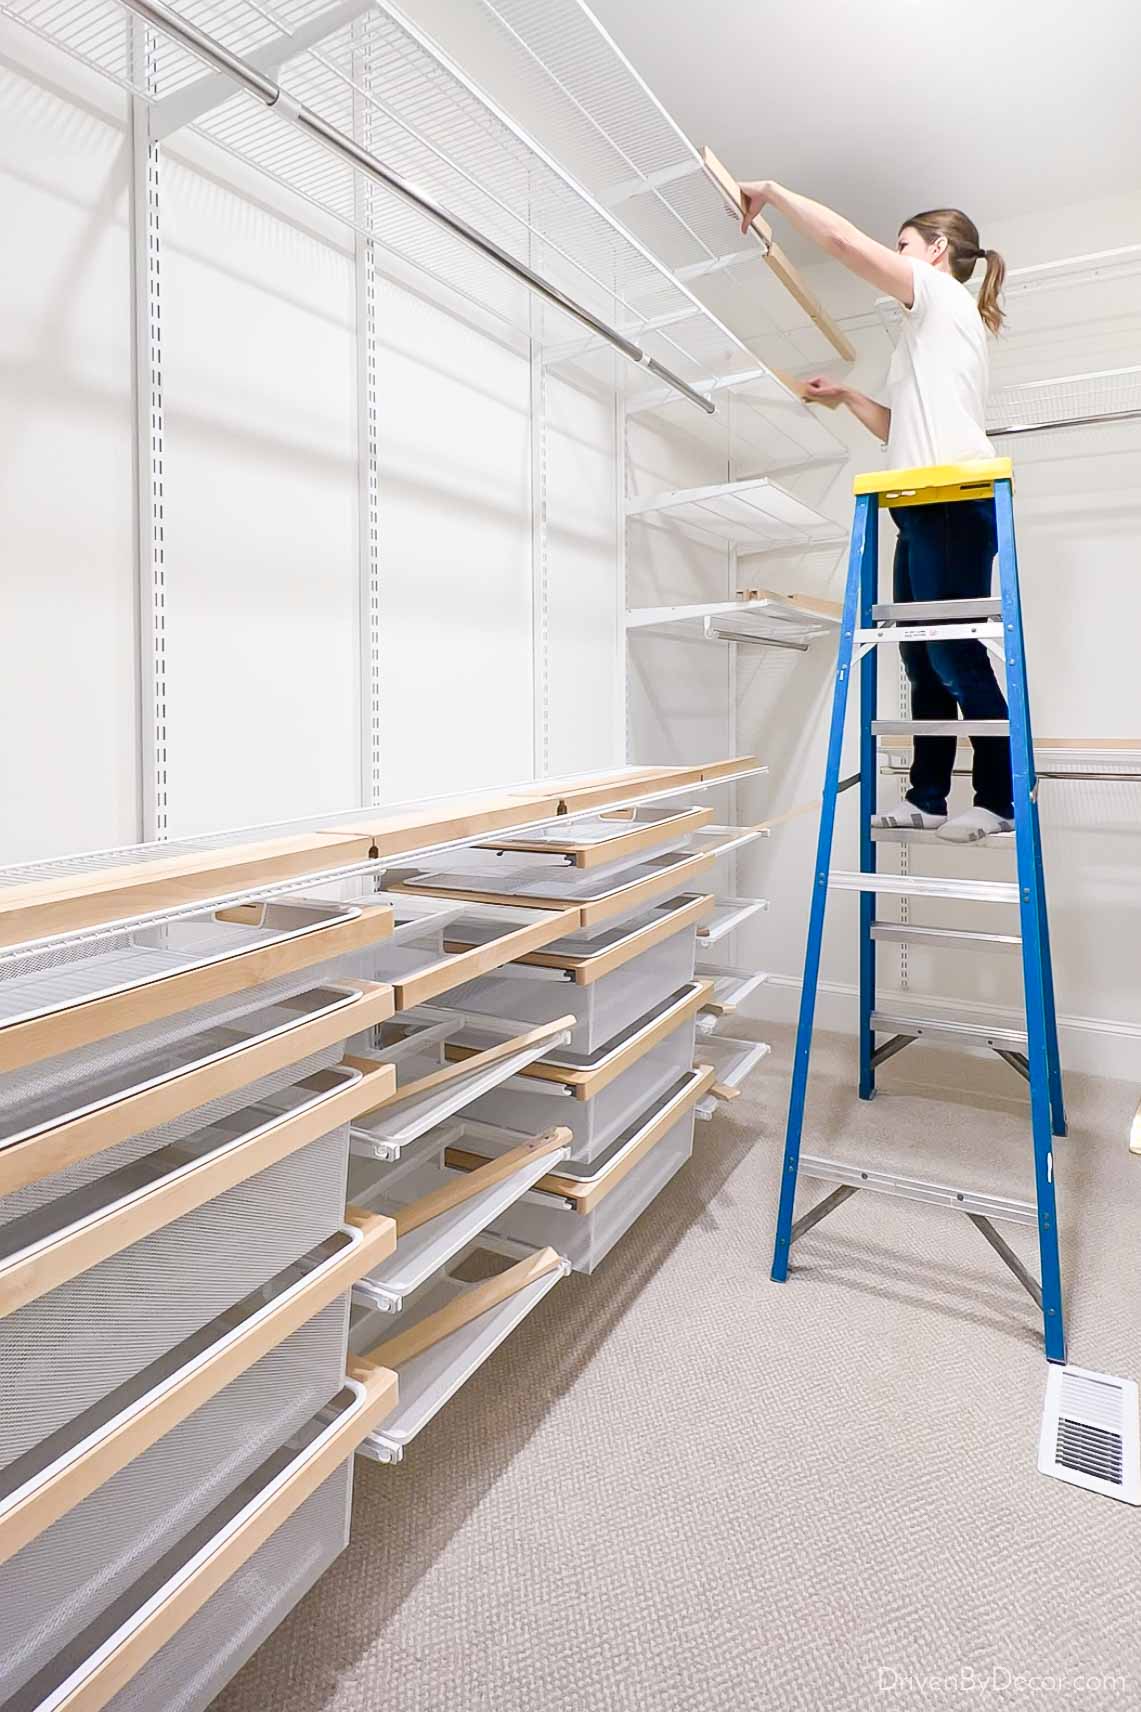
Other than the issues with securing the top track, installation was pretty straightforward with a series of online videos showing what to do for each step. After securing the top track, you hang all of the vertical “standards” from it:
and then install the brackets on the standards per your design plan:
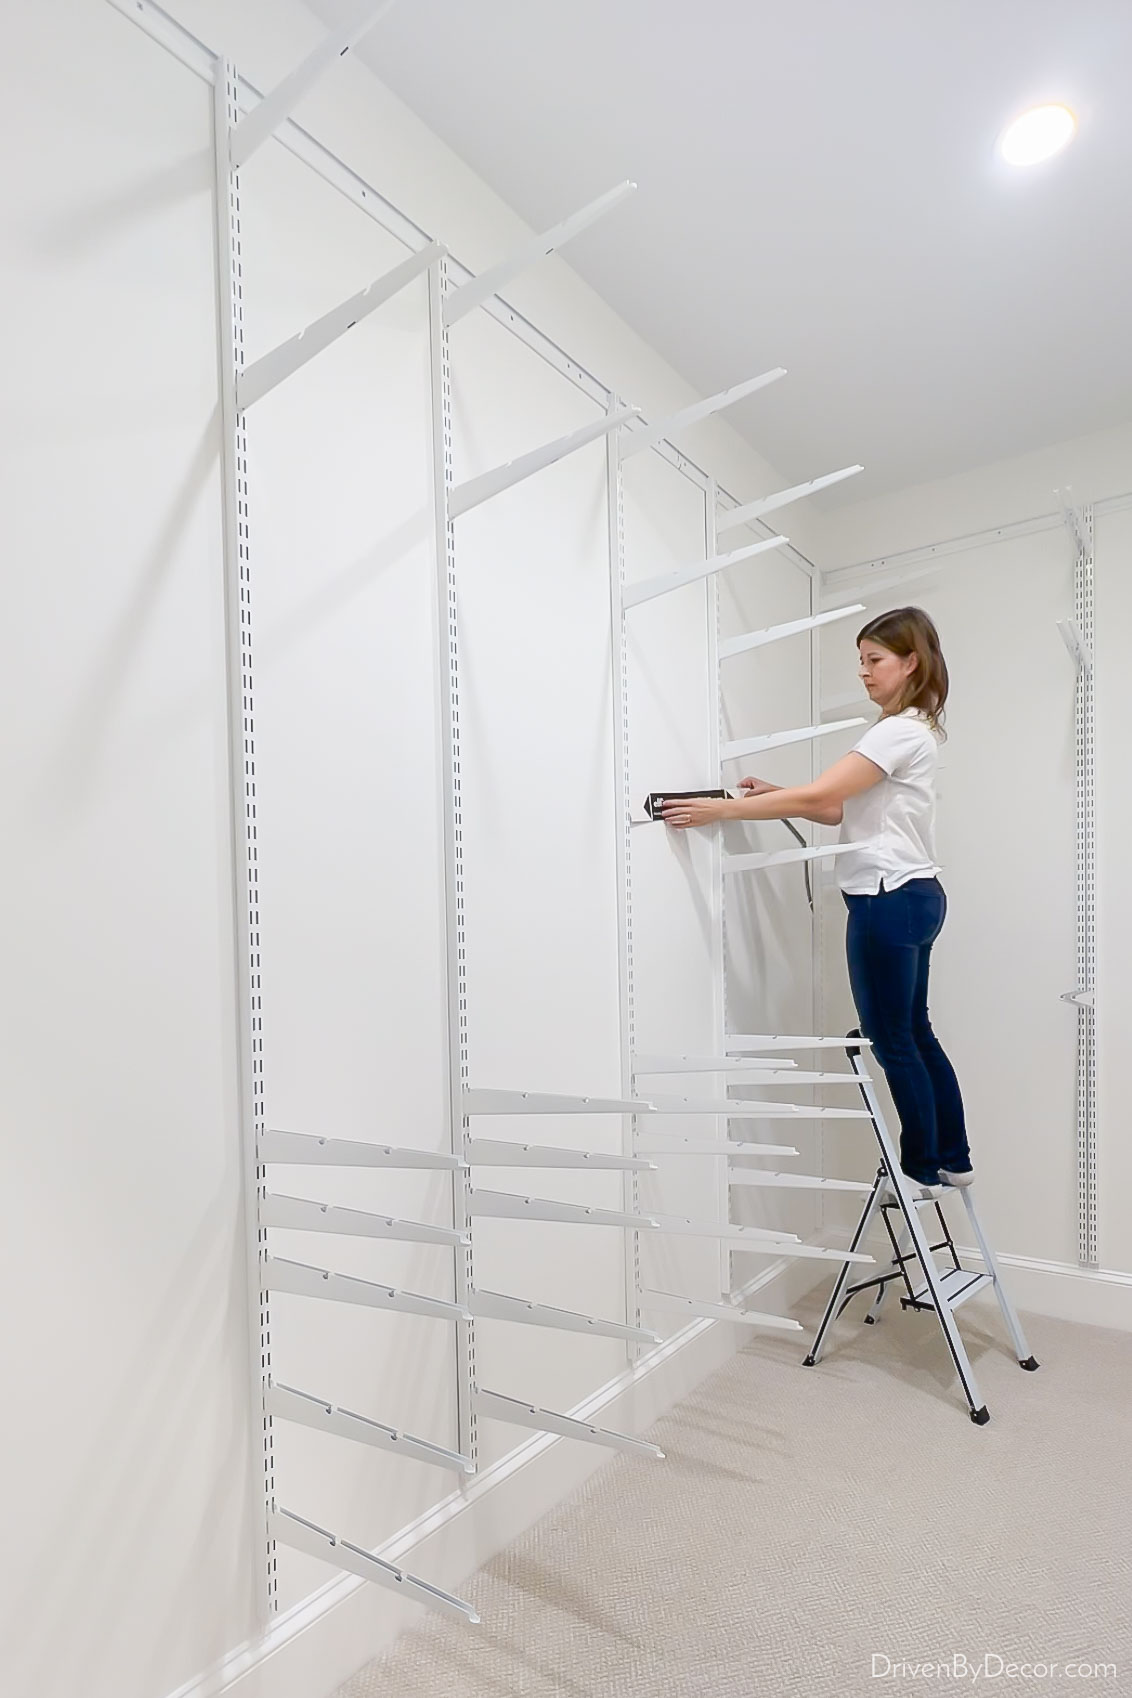
After adding the brackets to the vertical standards, you space them out along the wall according to your design plan measurements. Cardboard spacing strips that are included with your closet system supplies make it easy:
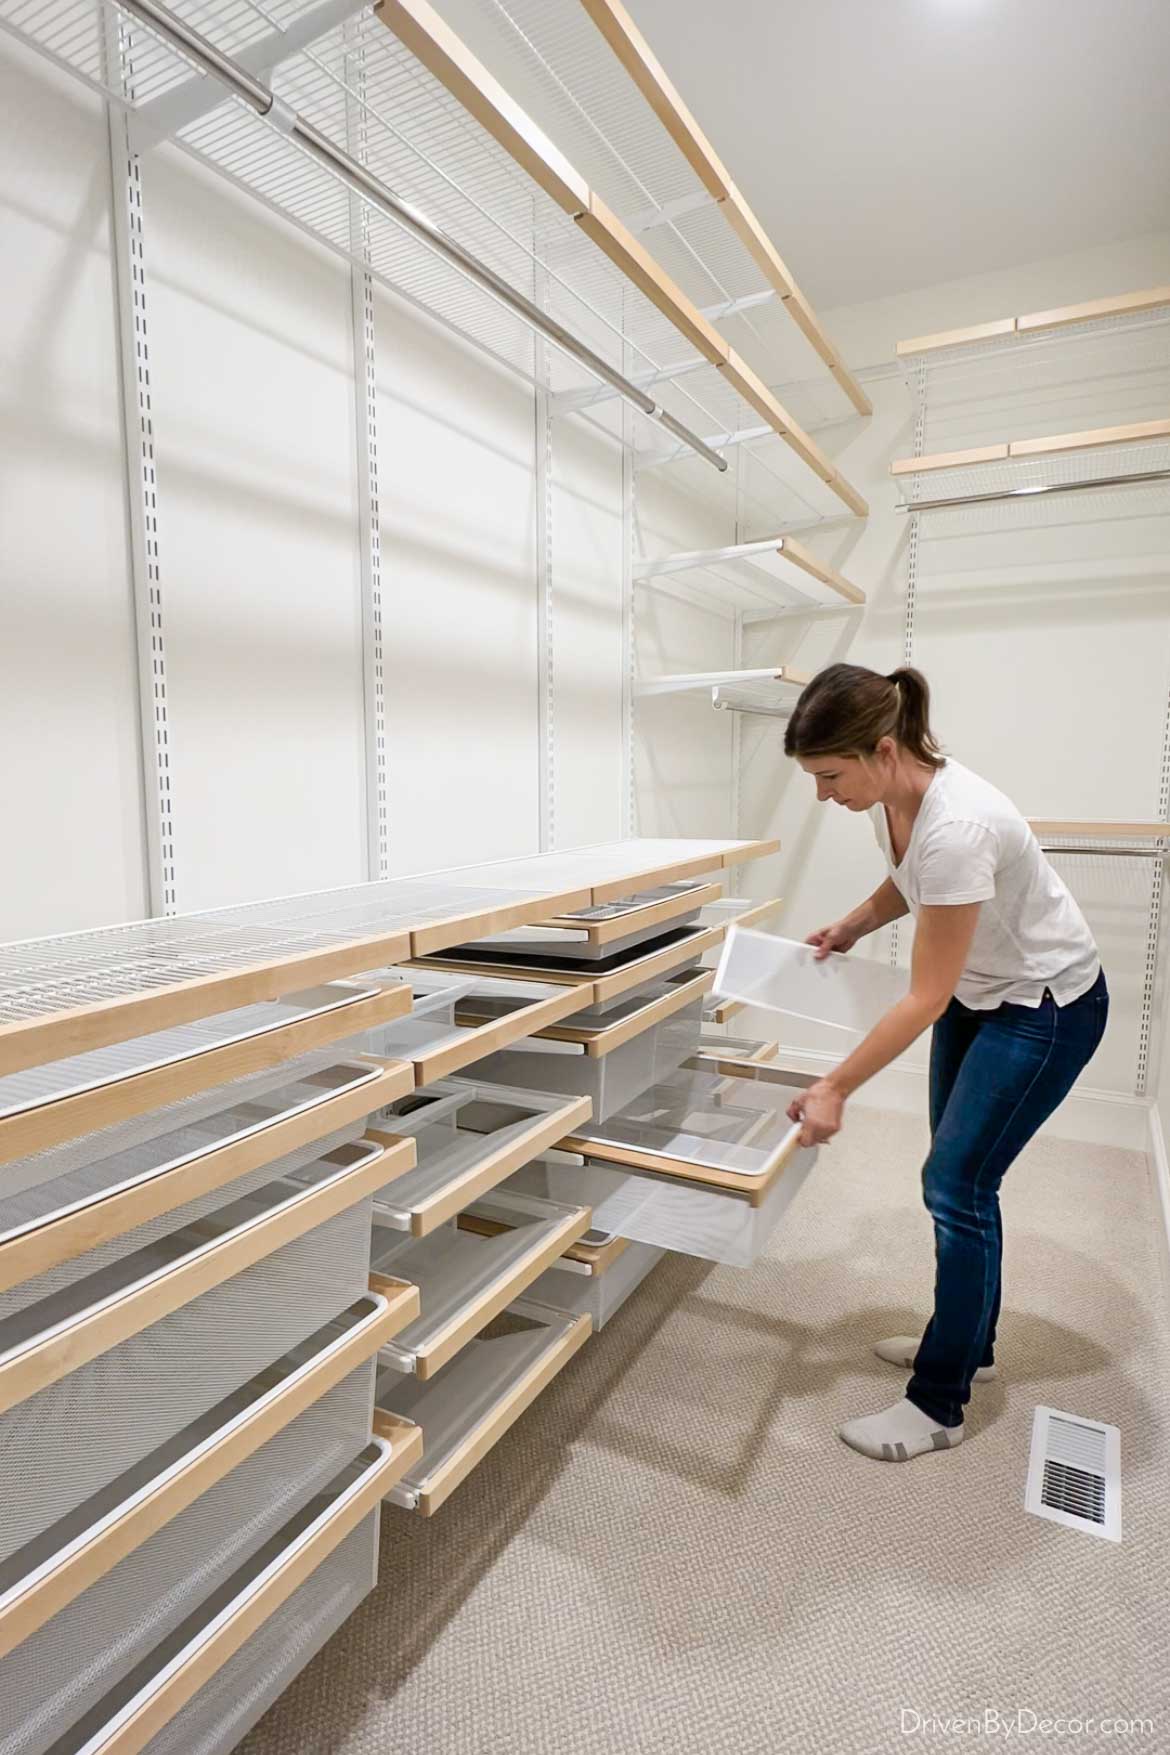
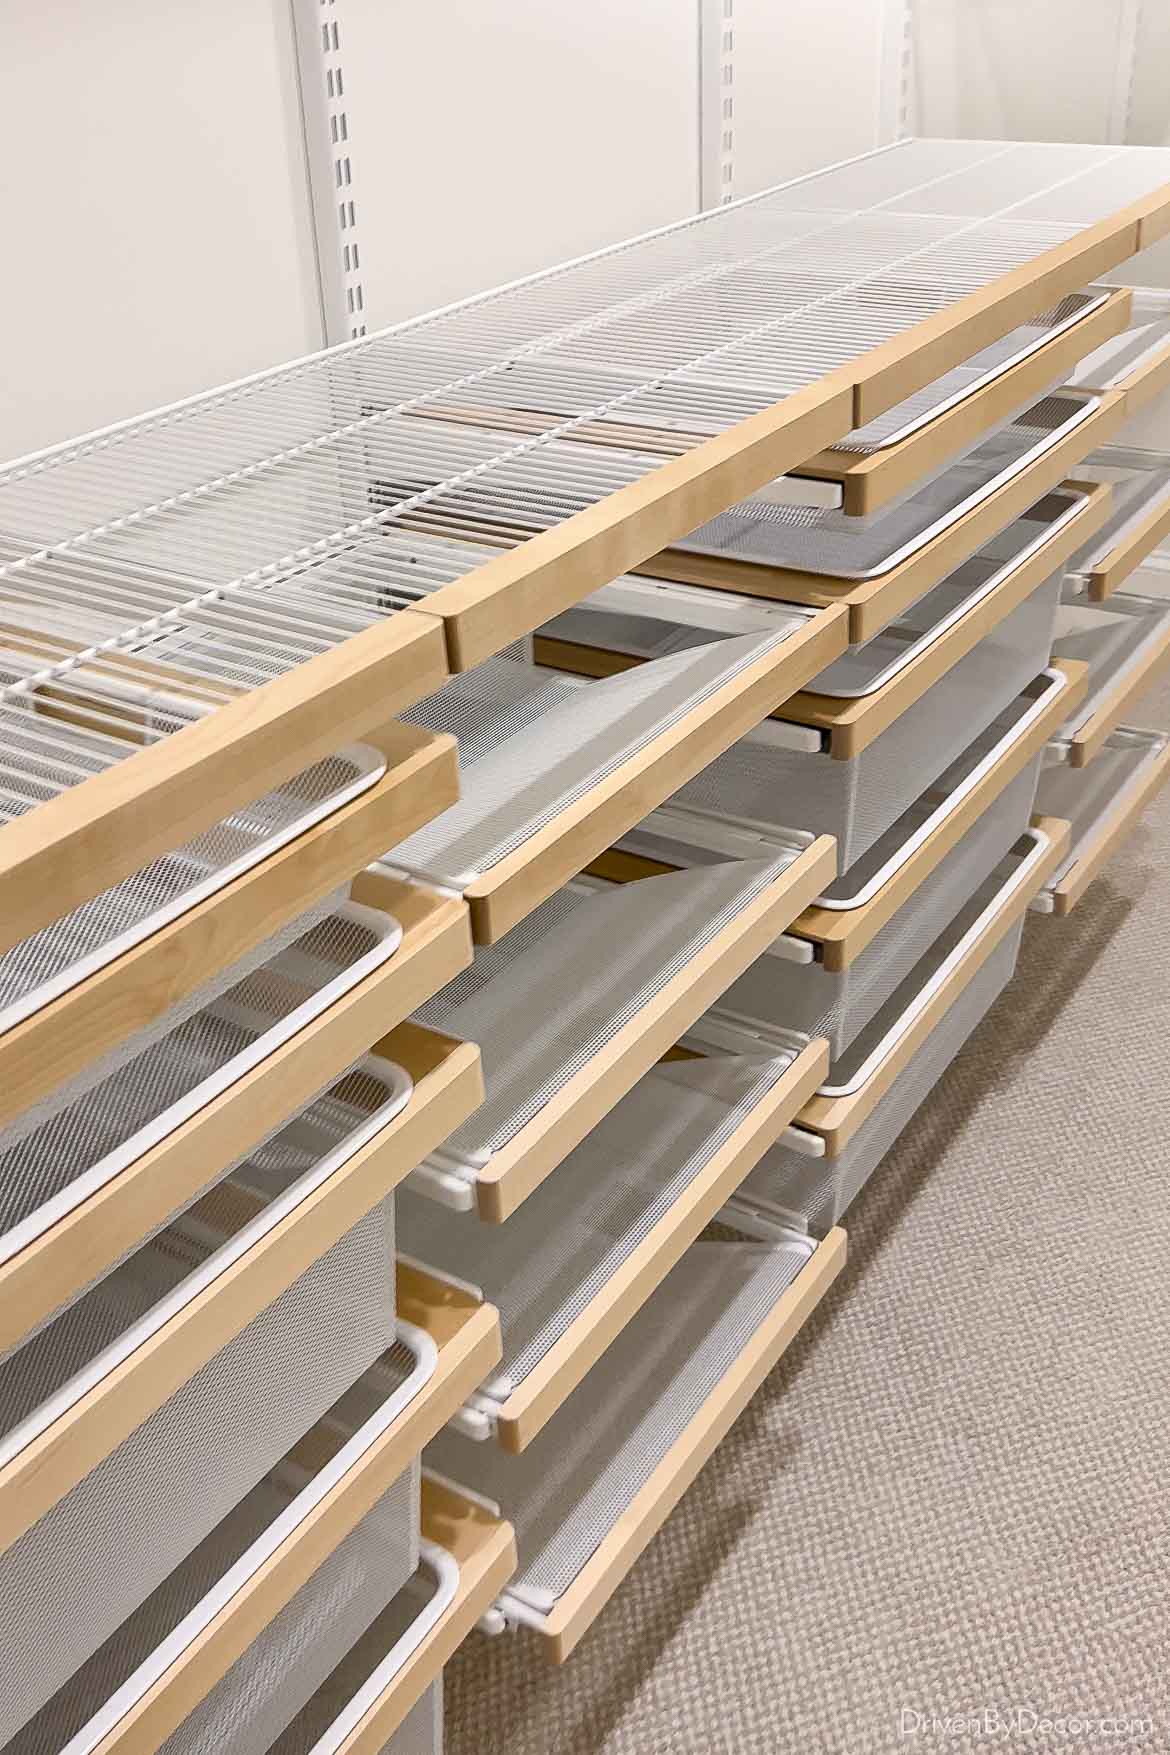
Next I attached the shelves:
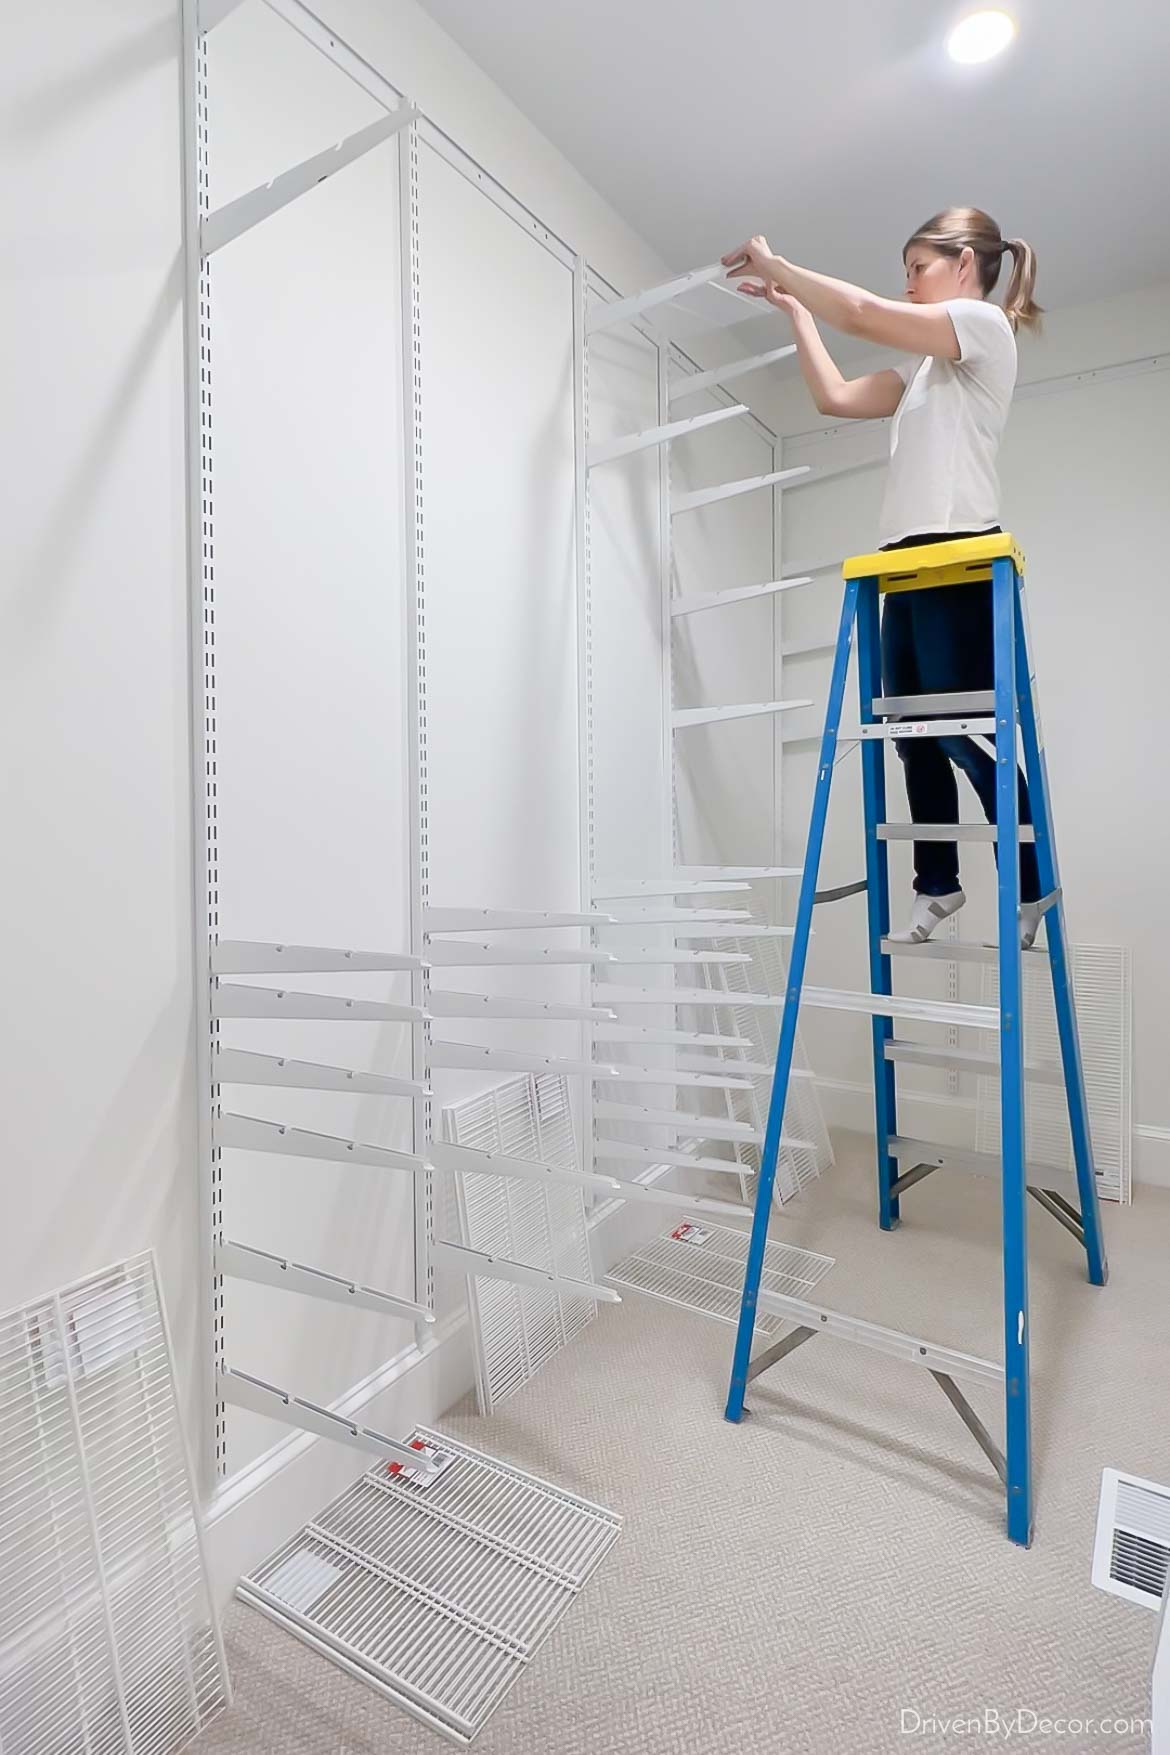
and the drawer tracks to the brackets:
Then I installed the hanging rods:
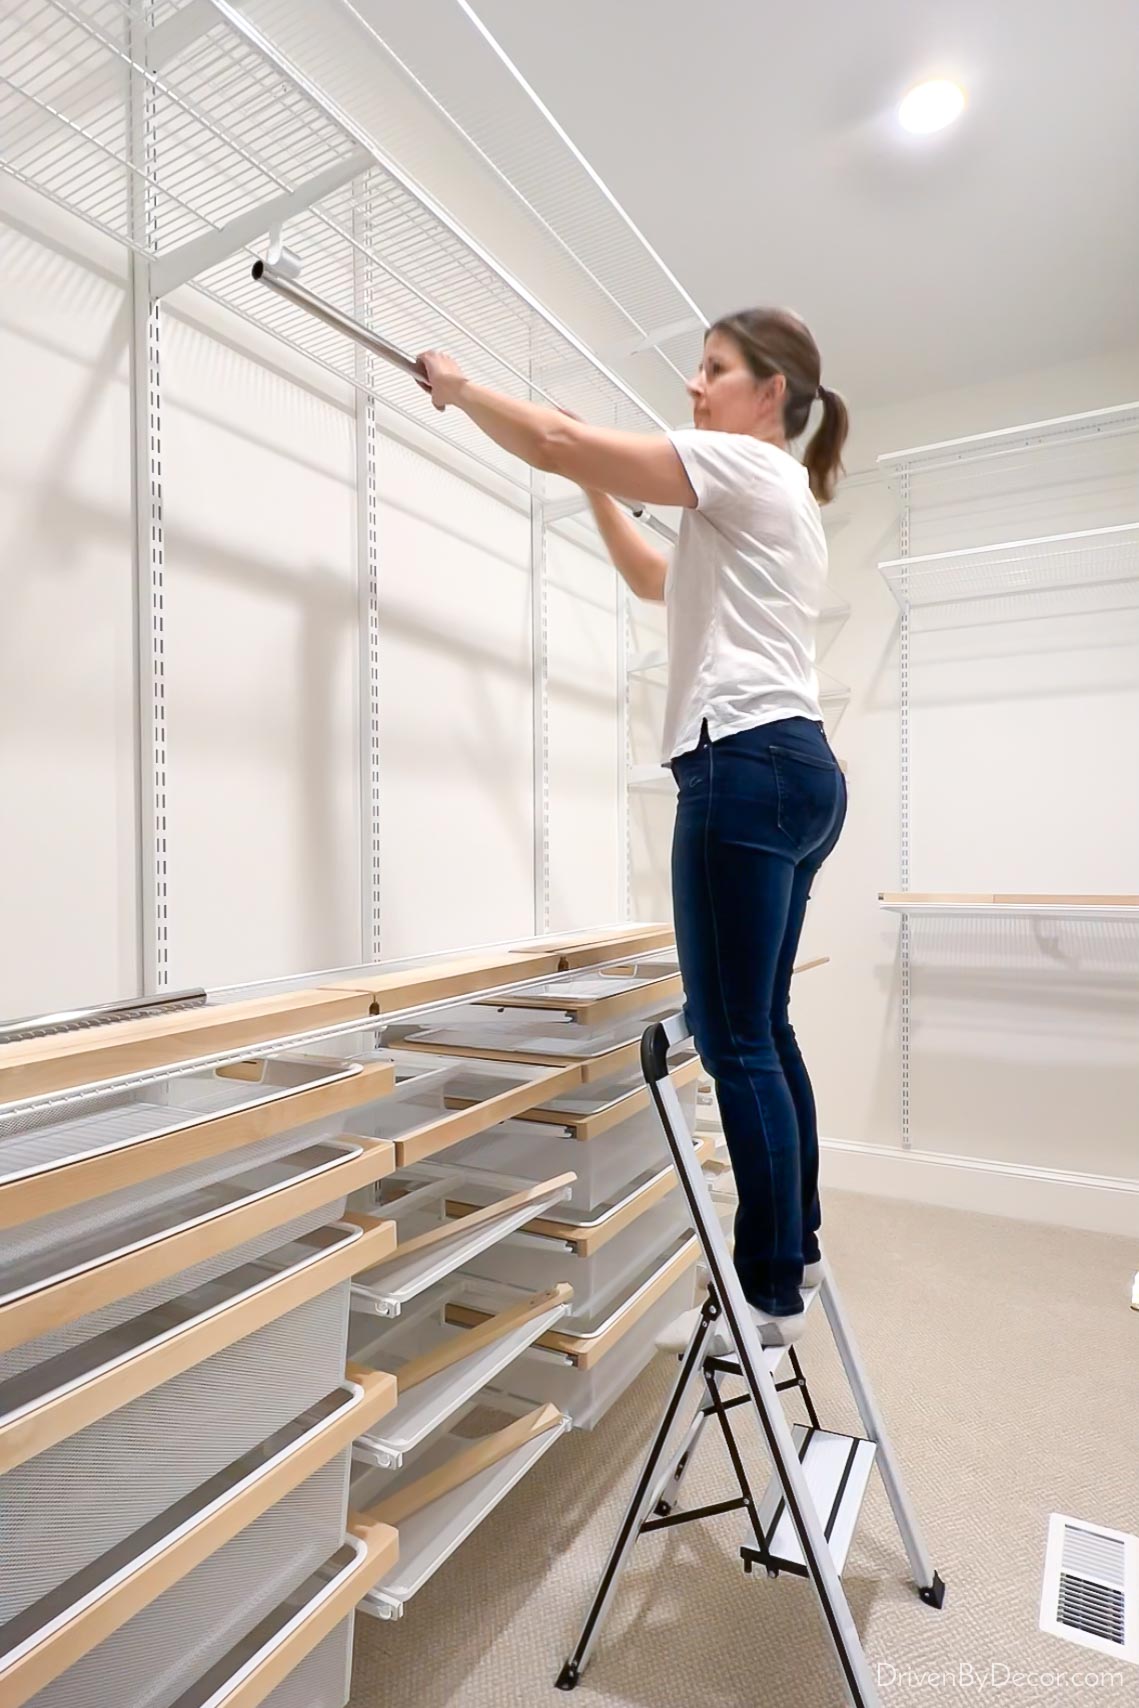
which simply nestle into hooks attached to the bottom of Elfa brackets:
If you’re doing a Classic Elfa system with no extras you’d be about done but since I had some Elfa Decor pieces (the light wood fronts) in my design, I had to clip those on to the fronts of the shelves and drawers:
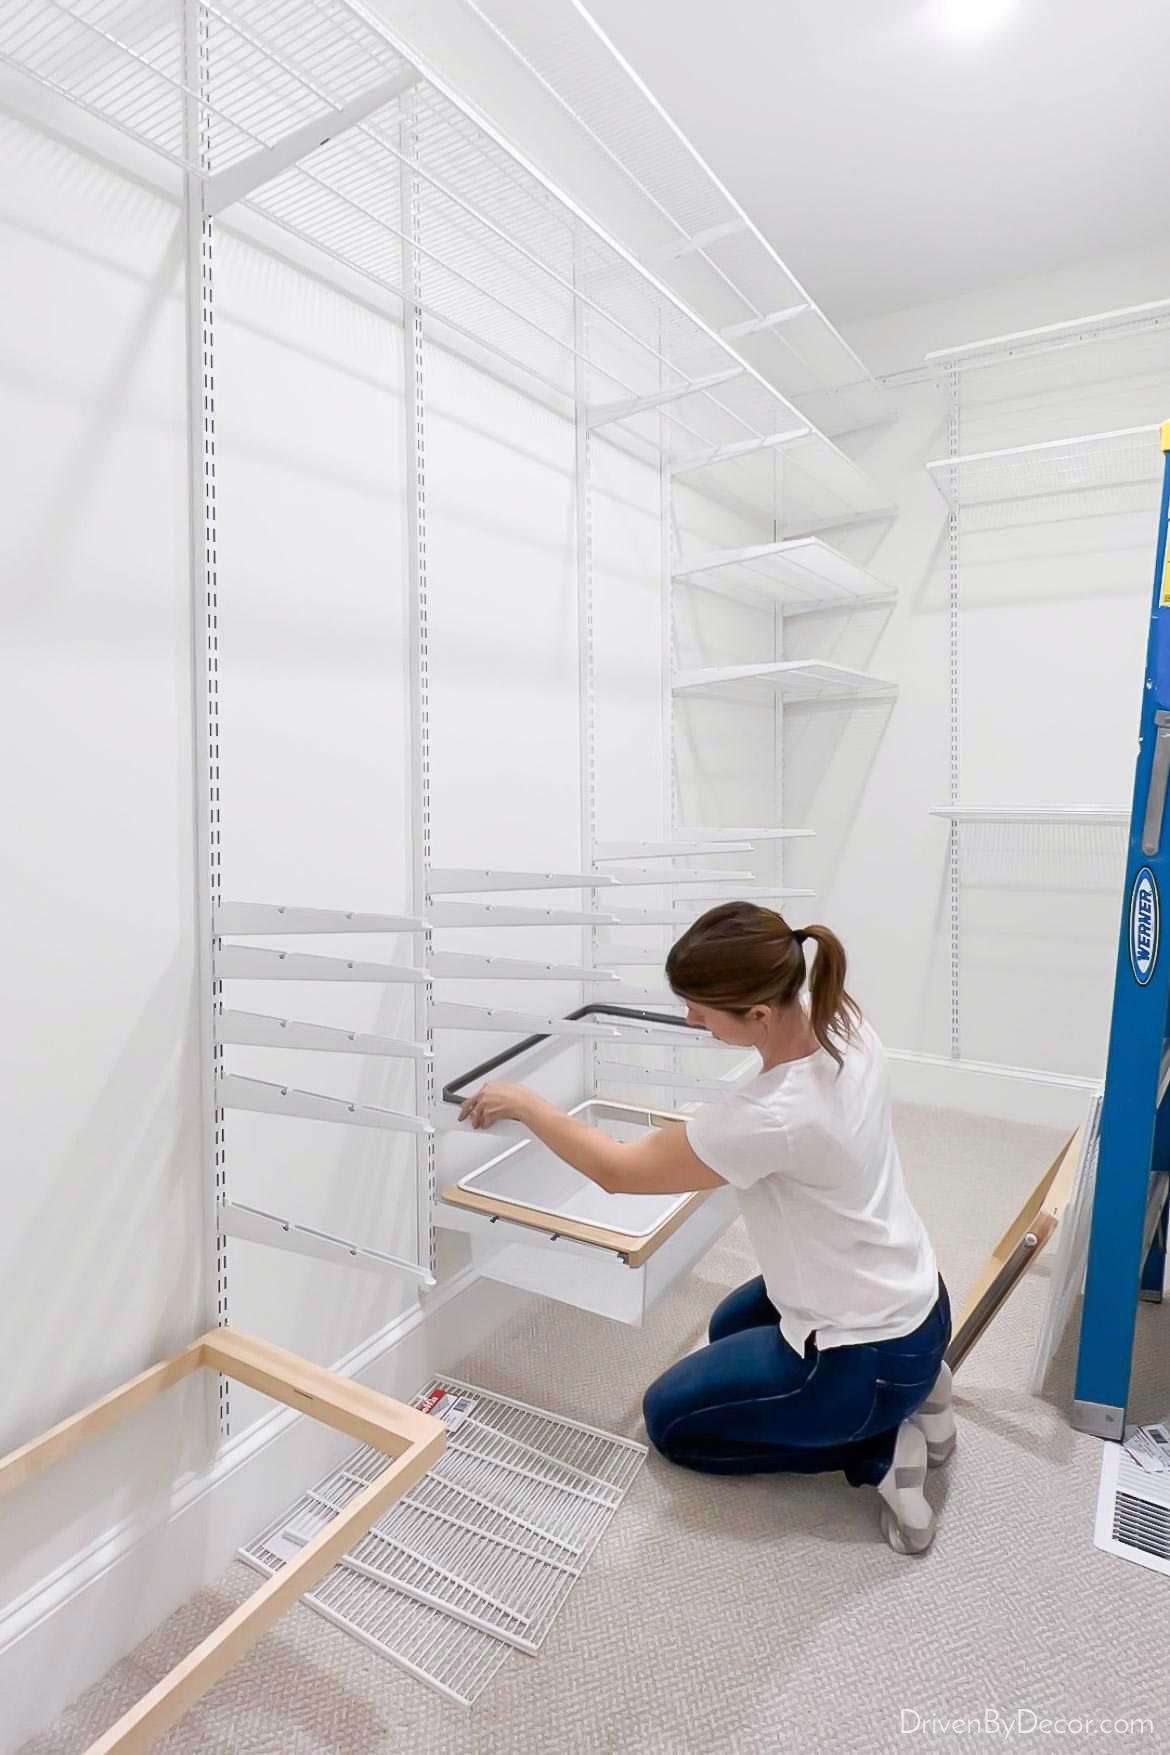
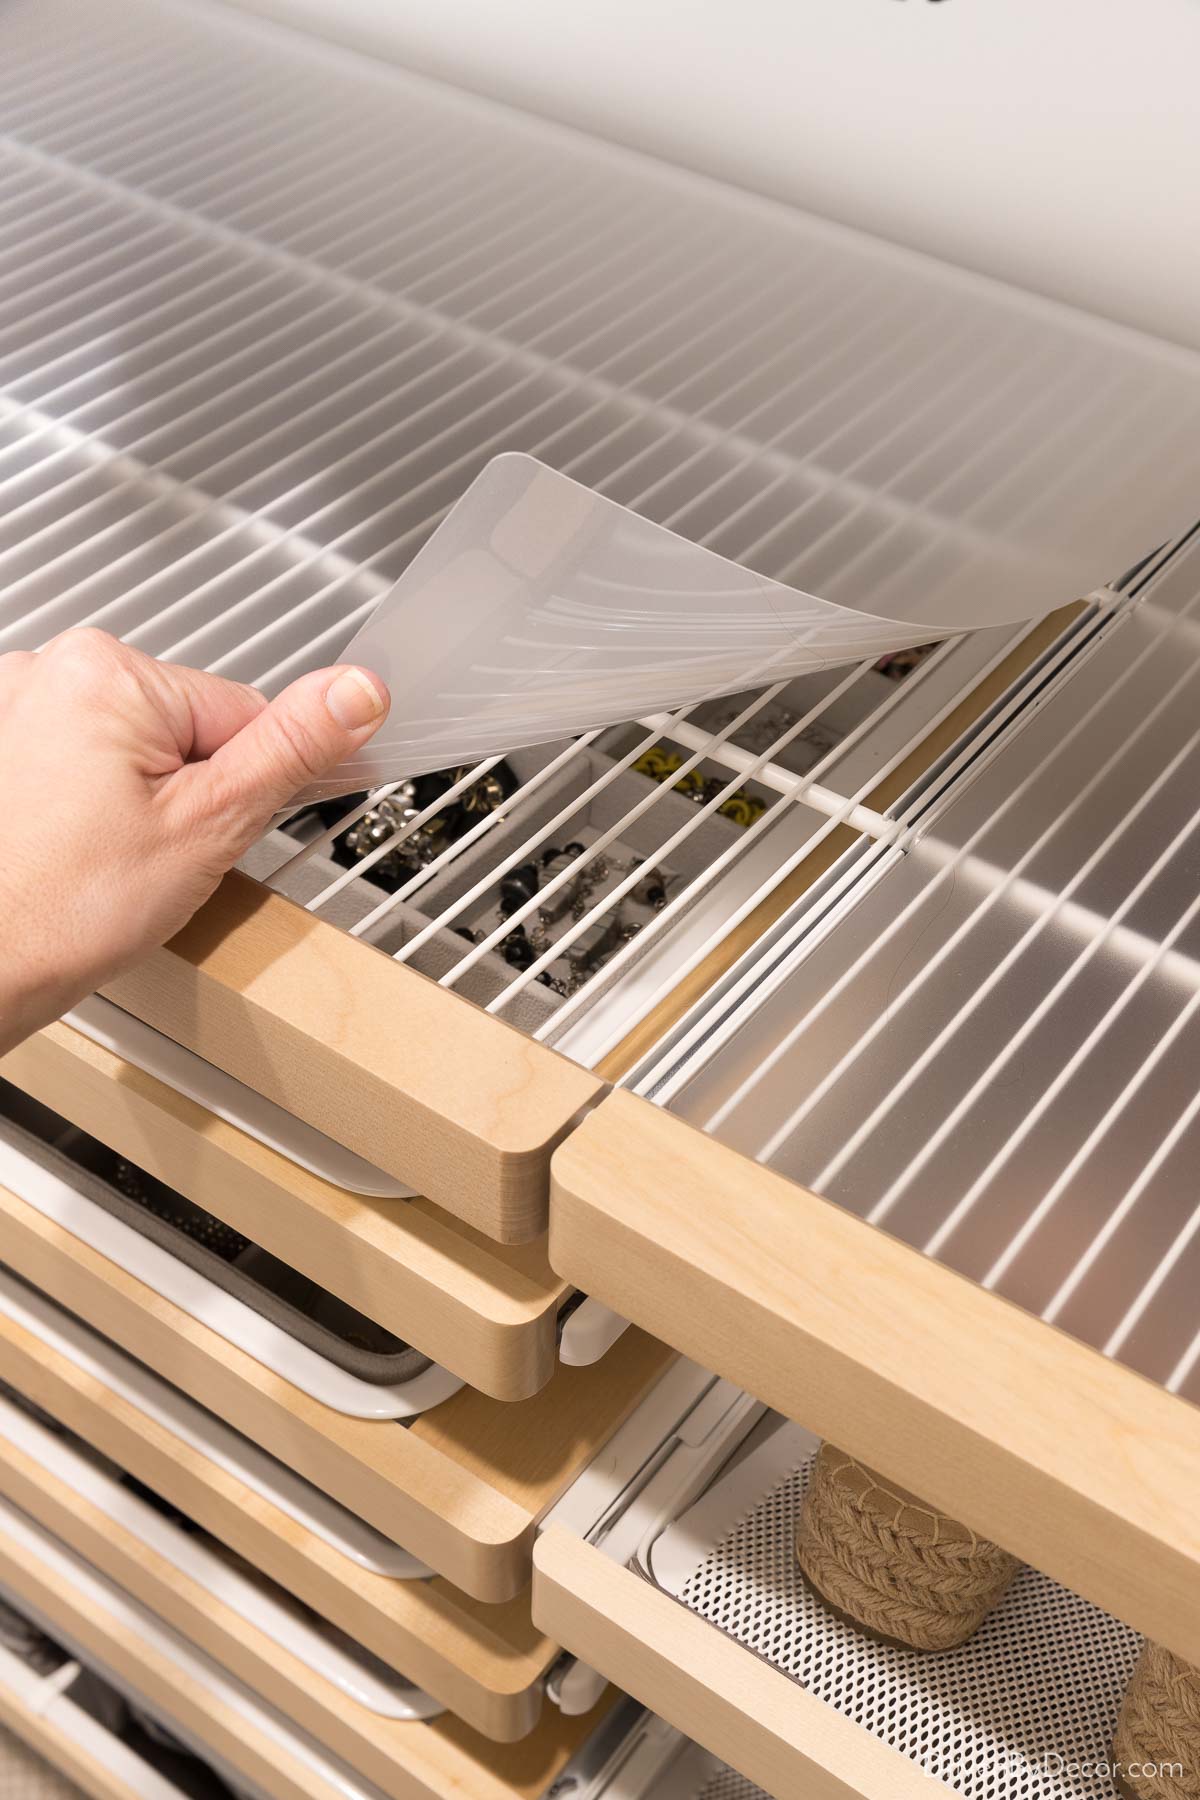
Then it’s time to add any accessories in your design plan such as accessory trays, drawer dividers,
and shelf liners:
Once I had made sure all of the shelves and drawers were at the final heights that I wanted, I added {this top track cover} that covers the screws in the track and {these strips} that cover the unused holes in the standards. The strips for covering the extra holes in the standards weren’t included in my design plan so I ordered those to be shipped to me.
And with that… installation is done!
We’re so happy with it, especially after living with rolling hanging racks in our bathroom for months before we got it done!
Elfa Classic vs. Elfa Decor
I mentioned the Elfa Decor line earlier and wanted to quickly explain the difference between that and their basic Elfa system. The basic Elfa system is called “Elfa Classic” – it’s their most affordable closet solution. You can choose one of three colors for your Elfa system – white, platinum, or graphite. If you took away all of the birch pieces from my closet design, I’d have an Elfa Classic system in white.
The Elfa Decor line consists of additional options that you can add onto an Elfa Classic system for a higher end look. In our closet, the birch Elfa Decor elements we added include birch “fascia” (shelf and shoe pull-out fronts) and drawer frames:
We could have elected to also have Elfa Decor shelves that are fully birch (instead of the ventilated white shelves with the birch only on the front) and birch drawer frames that cover the entire front of the drawers, but the cost of the Elfa Decor pieces really adds up so we skipped those options. While we chose birch, other color options for Elfa Decor components include gray, white, and walnut.
If you want even more of a custom closet look than Elfa Decor, The Container Store also has two higher end lines, Avera and Laren, that you can check out {here}. They include options such as back panels, LED lighting, and more premium materials and finish options that come with a higher price tag.
Elfa Closet Cost
Obviously the cost of your Elfa closet is going to depend upon the size of your closet, the components you choose, and whether you upgrade to any Elfa Decor components. To get an idea of cost, {this page showing several Elfa solutions} can give you a good estimate of the price range for a closet similar in size to your own.
For our large walk-in closet (122″ on one wall and 55″ on the other) including all of the Elfa Decor pieces, the total retail price of our system was $3987 – the 20% off sale they were running took the price down to $3189. If we had elected to do Elfa Classic with none of the Elfa Decor birch pieces, the cost would have been significantly less – a retail price of approximately $2750 and sale price of approximately $2200.
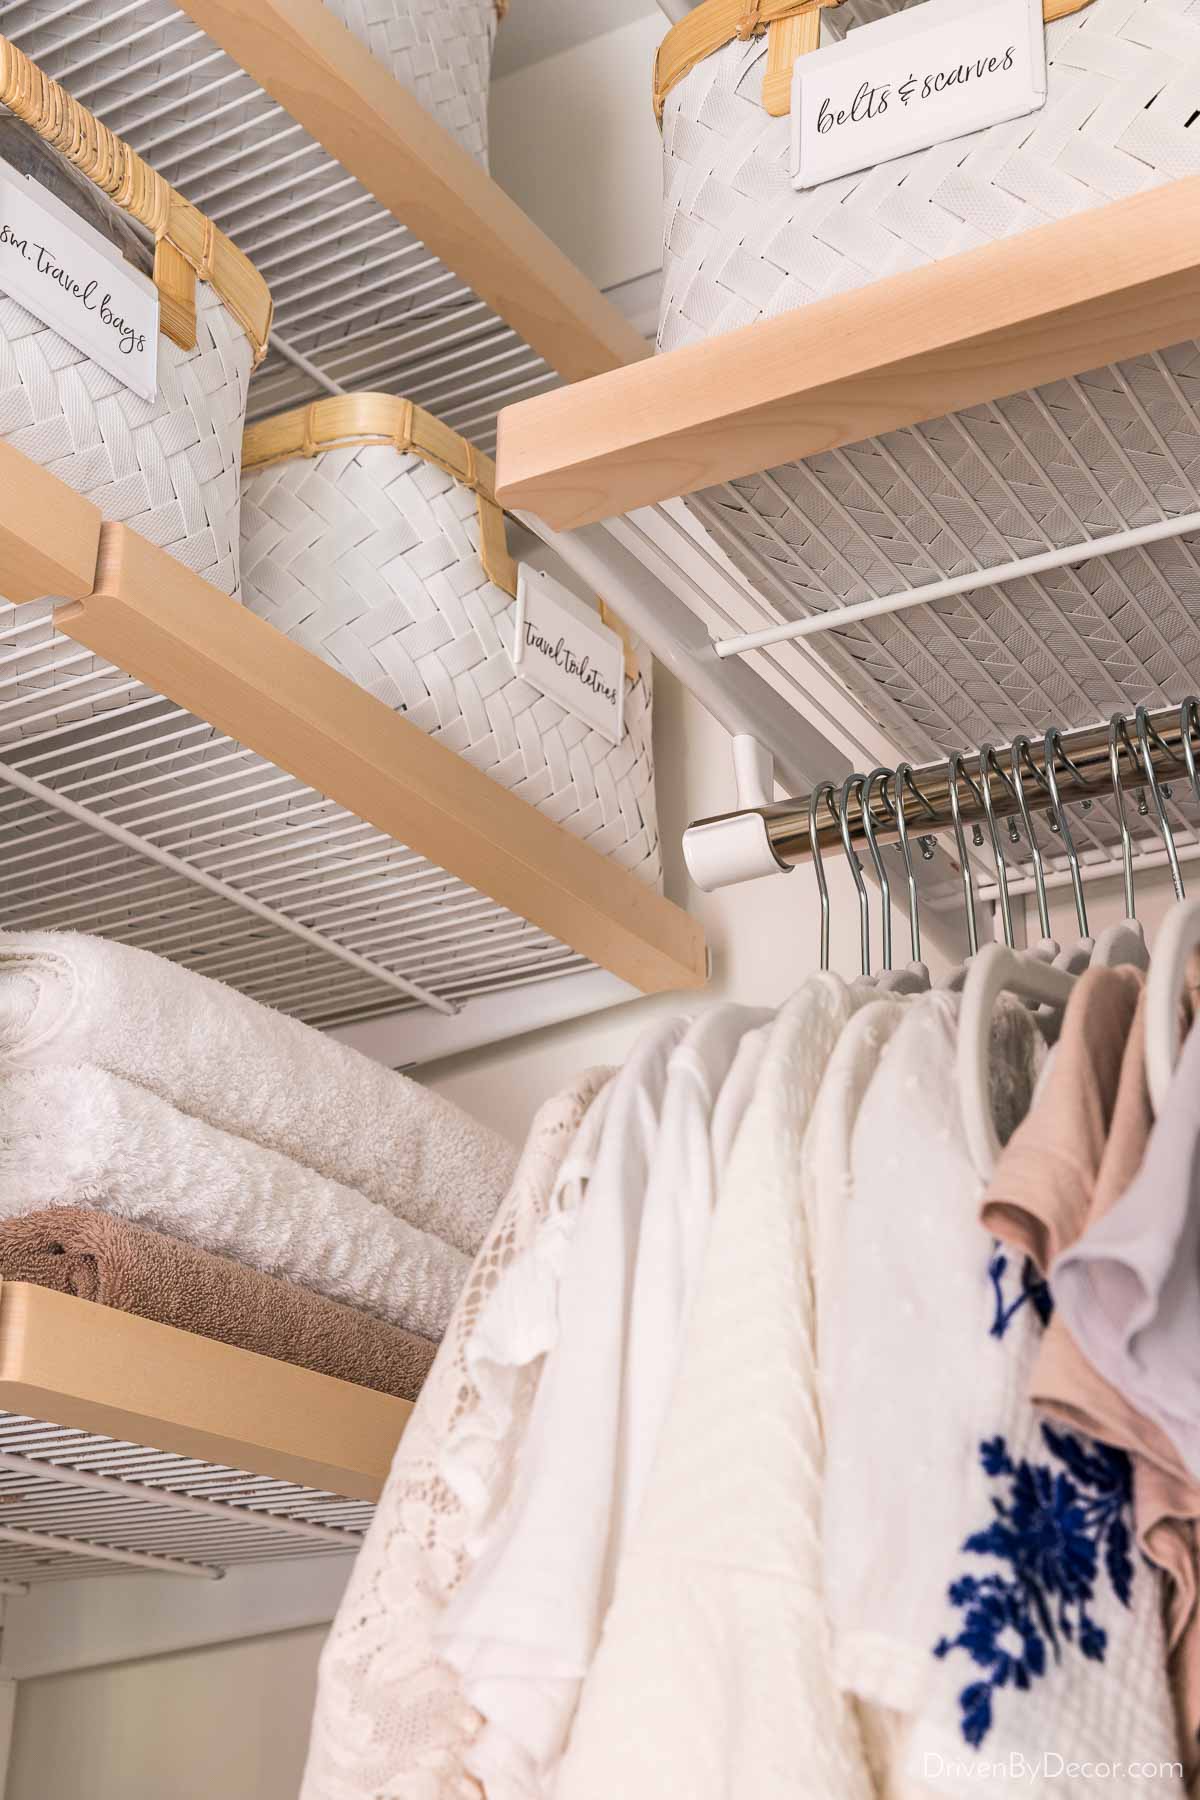
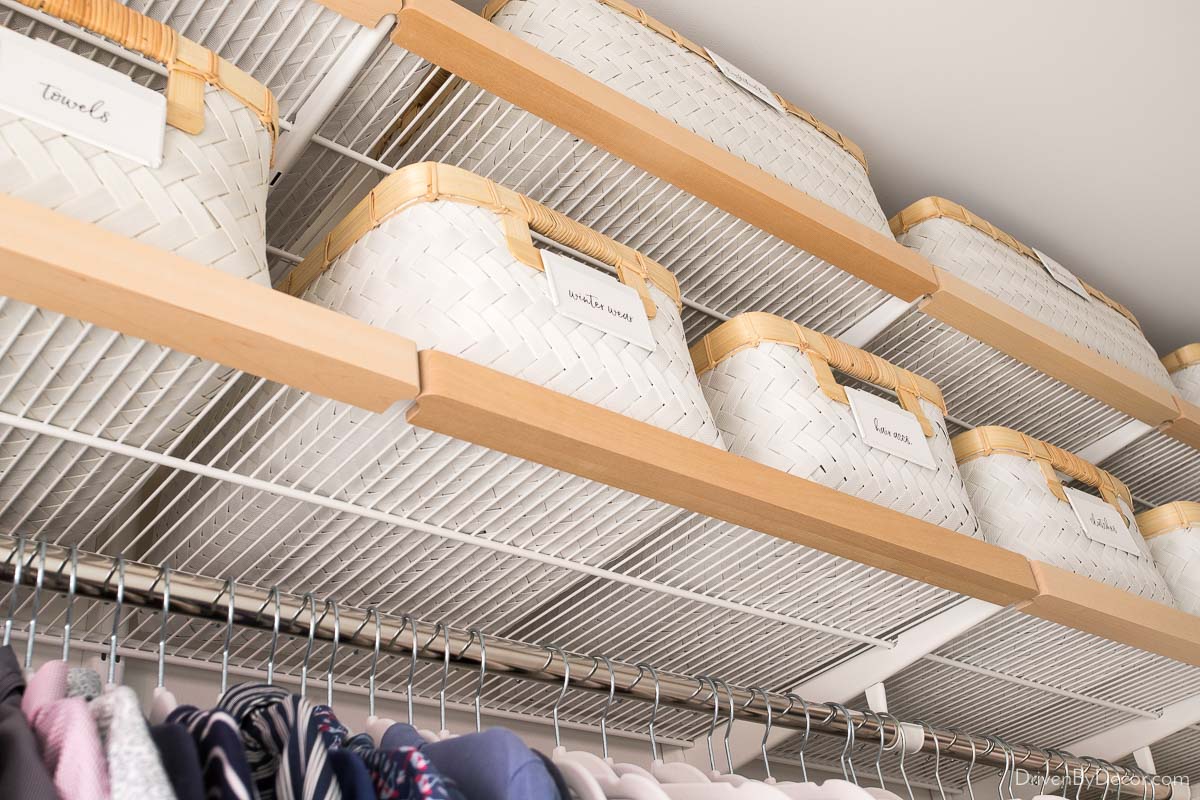
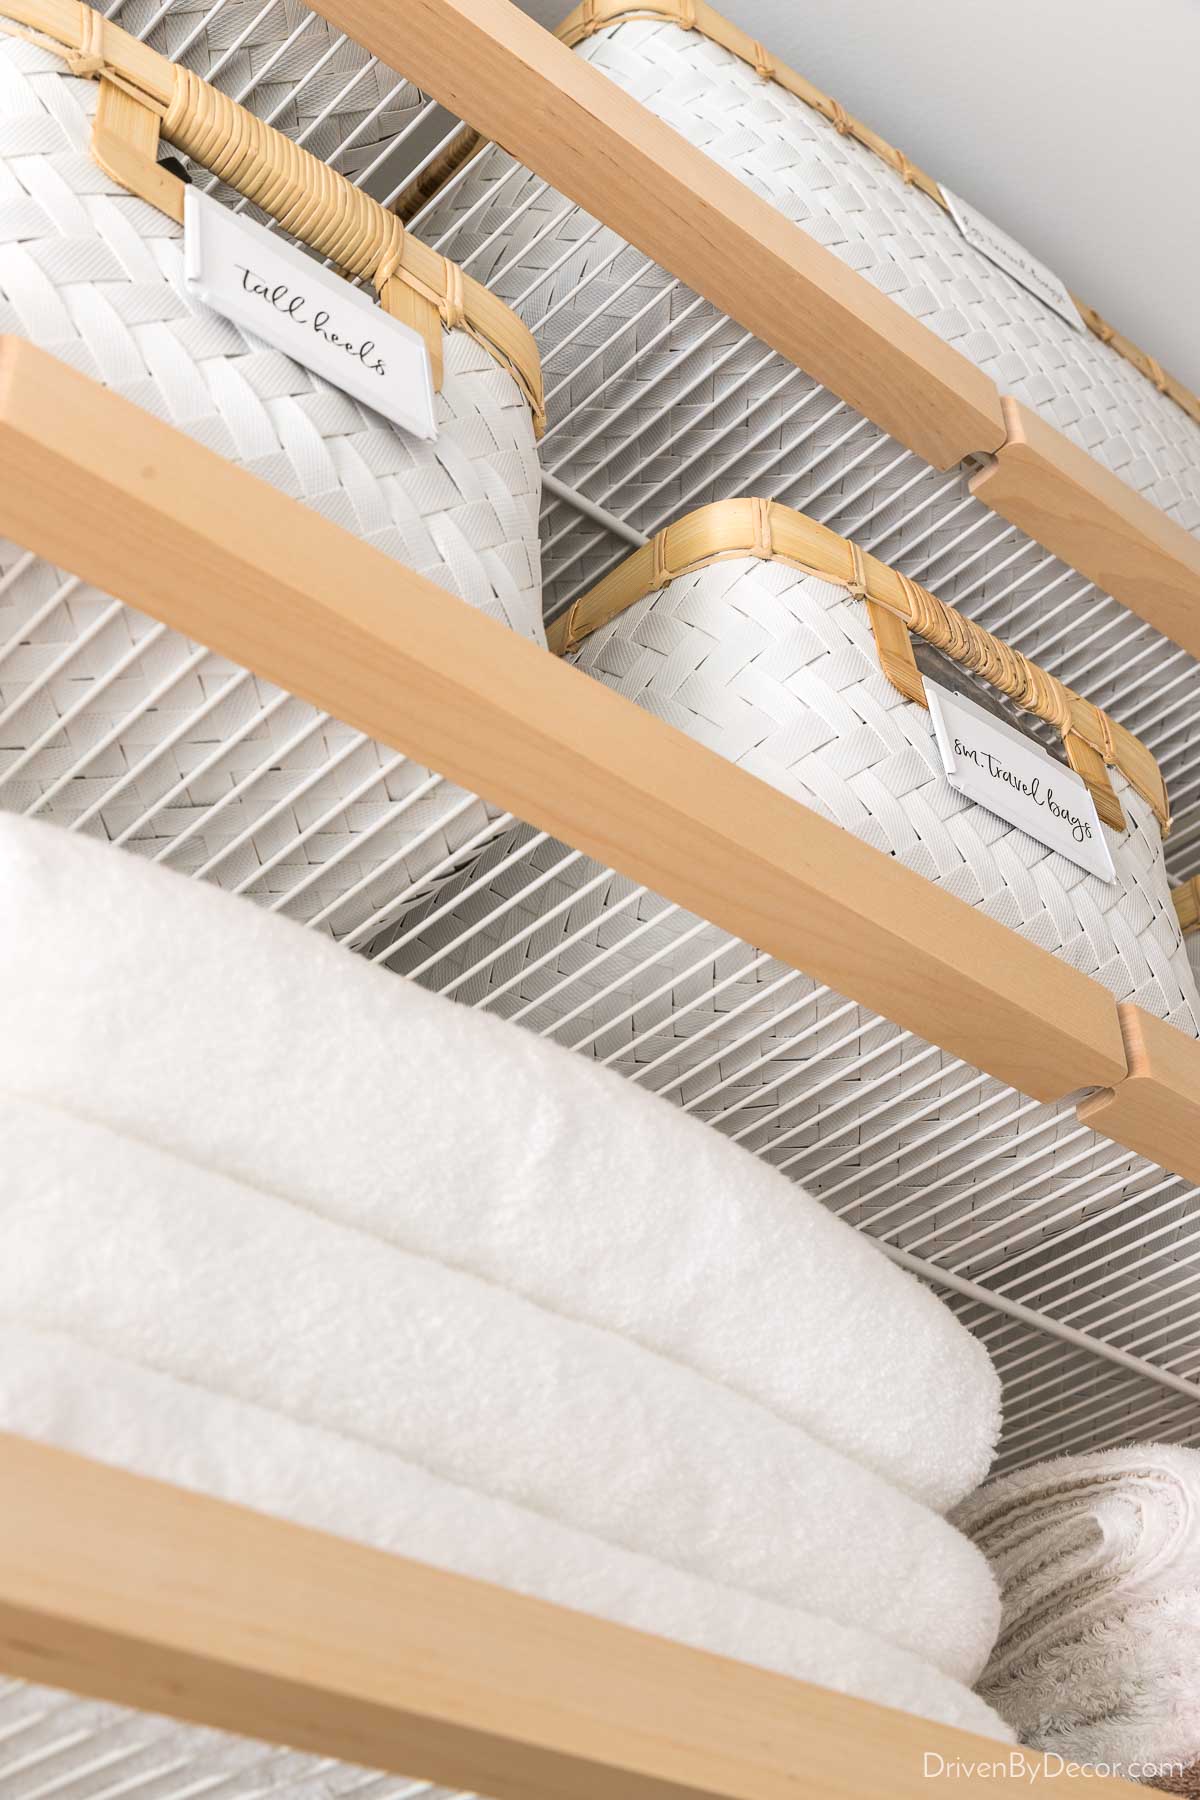
These costs don’t include the baskets in my closet which I already had from the closet in our old house (they’re the medium and large sized Hampton bins from The Container Store {here}):
Installation costs are additional and were significant for our master closet, which is why we elected to DIY it. The cost if we had chosen to hire-out for installation services was going to be a whopping $1110 (it’s possible that ours was on the high side since we’re two hours away from the nearest Container Store).
Installation is a full service affair – the installers custom cut your Elfa system on site and will even remove a certain amount of old shelving, patch the old holes, and paint over them before installing the new system. Definitely a great option if it’s within your budget and you’re not much of a DIYer.
Elfa Closet System vs. IKEA PAX System
As mentioned, in our previous home we added a large walk-in closet with IKEA’s PAX system as part of our bathroom remodel:
We LOVED our closet – take the full tour of our IKEA PAX closet to check it out!
Now that I’ve designed, installed, and used both IKEA’s PAX system and The Container Store’s Elfa system, I’m able to give you an unbiased opinion on how the two systems compare. The honest truth is that I don’t feel like one system is “better” than the other – the best choice system depends on what you’re looking for in a closet system and the dimensions of your closet space. These are the pros and cons that I see when comparing the two systems:
PAX System
Unlike Elfa closets that are designed on a track system, the PAX system is designed based on a series of wardrobe frames (essentially tall boxes) that you line up side by side. This in-progress pic from the closet in our old house shows how one side of our closet was made up of three wardrobe frames attached to each other in a line:

The interior of each frame can then be customized with the addition of drawers, hanging rails, etc. That same side of the closet looked like this when it was finished:
Keep in mind that there are only two depth options for the PAX frames. One of the reasons we went with the Elfa system in our current closet is because the long wall of our closet was a few inches shallower than the depth of the PAX frames that we’d want to use, meaning that the end frame would overlap our closet door molding.
In comparing PAX vs. Elfa, one of the biggest pros of the IKEA PAX system is the price point, as it’s a less expensive option than the Elfa system. However, the trade-off is some sweat equity since assembling all of the PAX wardrobe frames and drawers and installing them in your closet takes a LOT more time than the installation of an Elfa system.
There’s a difference in planning the design of your closet too. With PAX, IKEA has an online closet planning tool you can use to design your closet yourself and you can get help from associates in the store, but much of the design is done on your own. Being the organizing geek that I am, I actually enjoyed designing my own PAX closet but a lot of people don’t want to take the time and mental energy to do it. And I admittedly made multiple trips to IKEA to get parts that I didn’t initially realize I needed. The Container Store offers full service design and I got everything I needed with a “one and done” trip.
While it’s personal preference, I feel like another pro of the PAX system is the design of their drawers. The KOMPLEMENT drawers that are part of the PAX system come in three different widths with the longest being a full 39″ wide and they even have soft close slides:
You can choose from a few different drawer front designs and even customize them with your own hardware like I did with {these acrylic pulls} on the drawers in the PAX system I installed in the laundry room of our previous house:
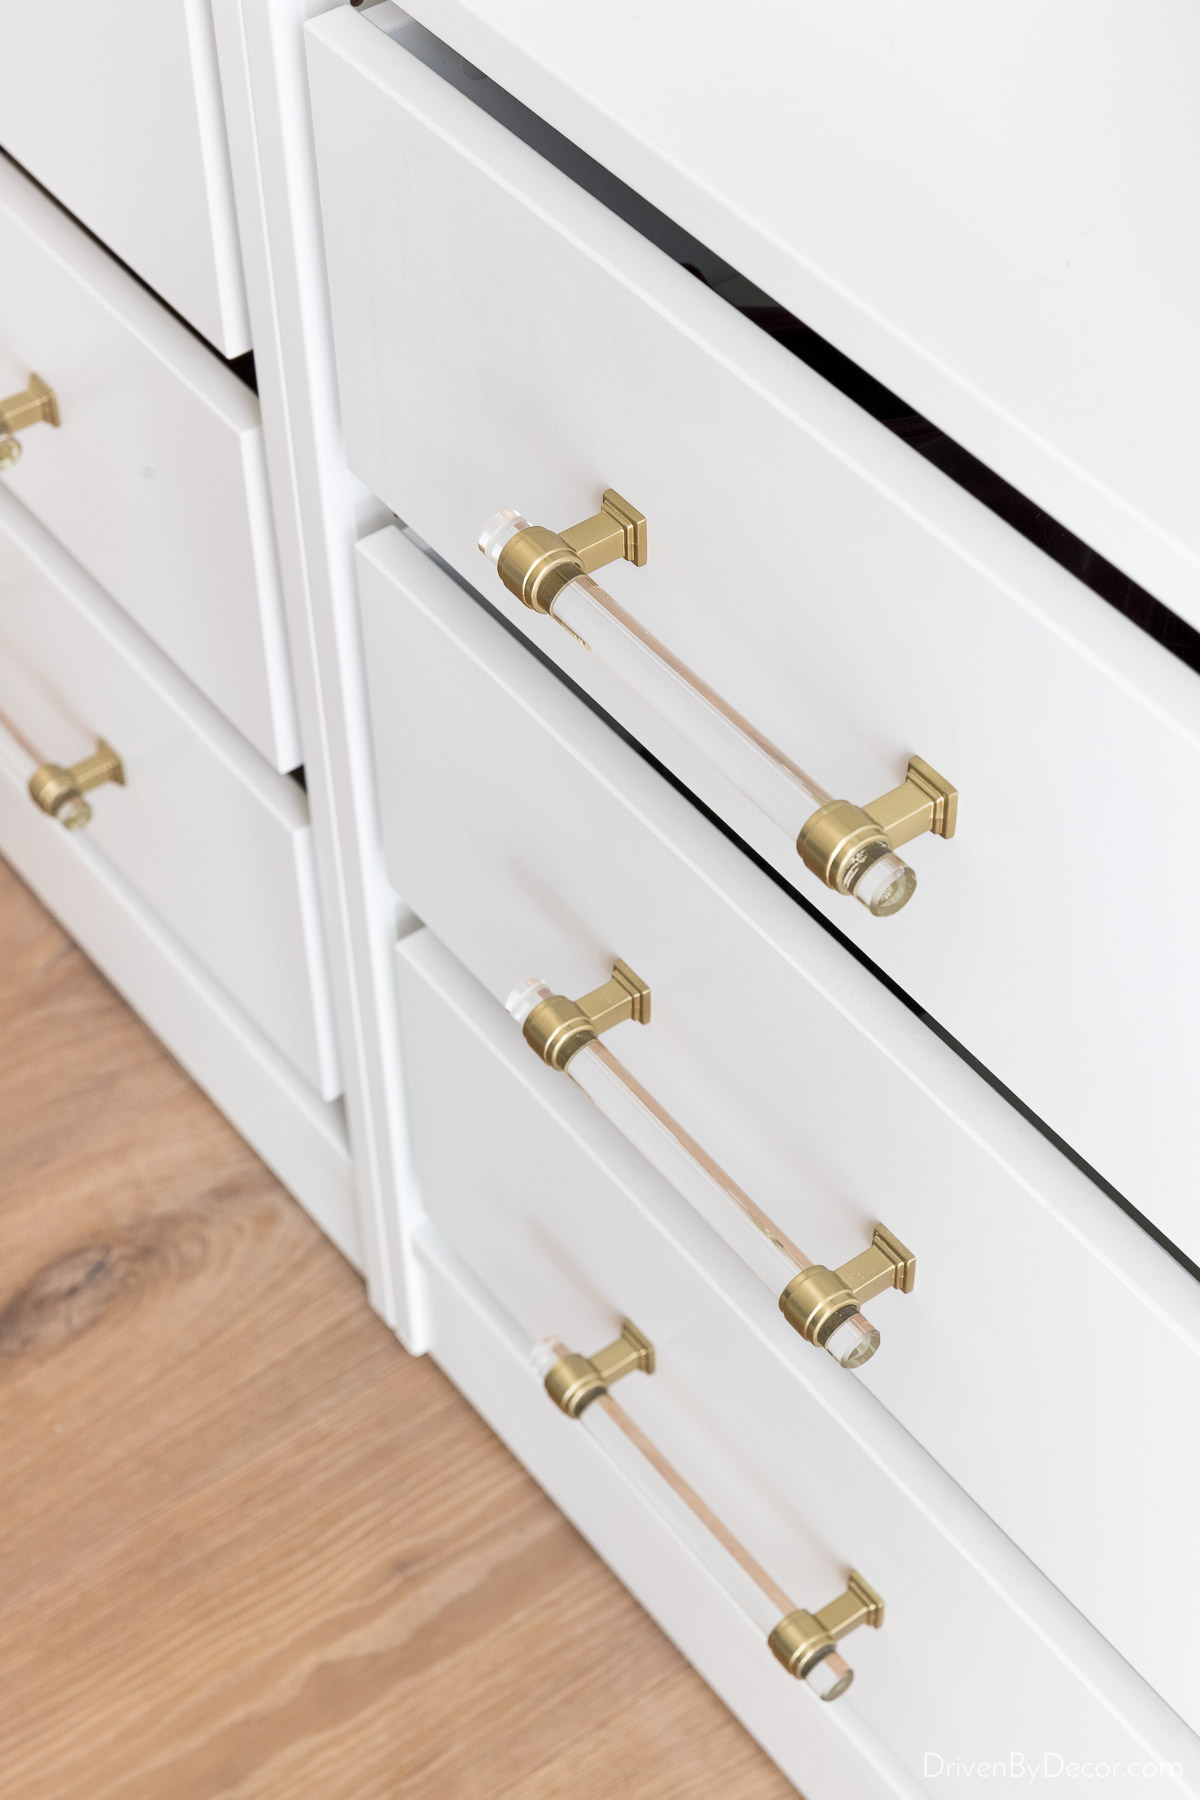
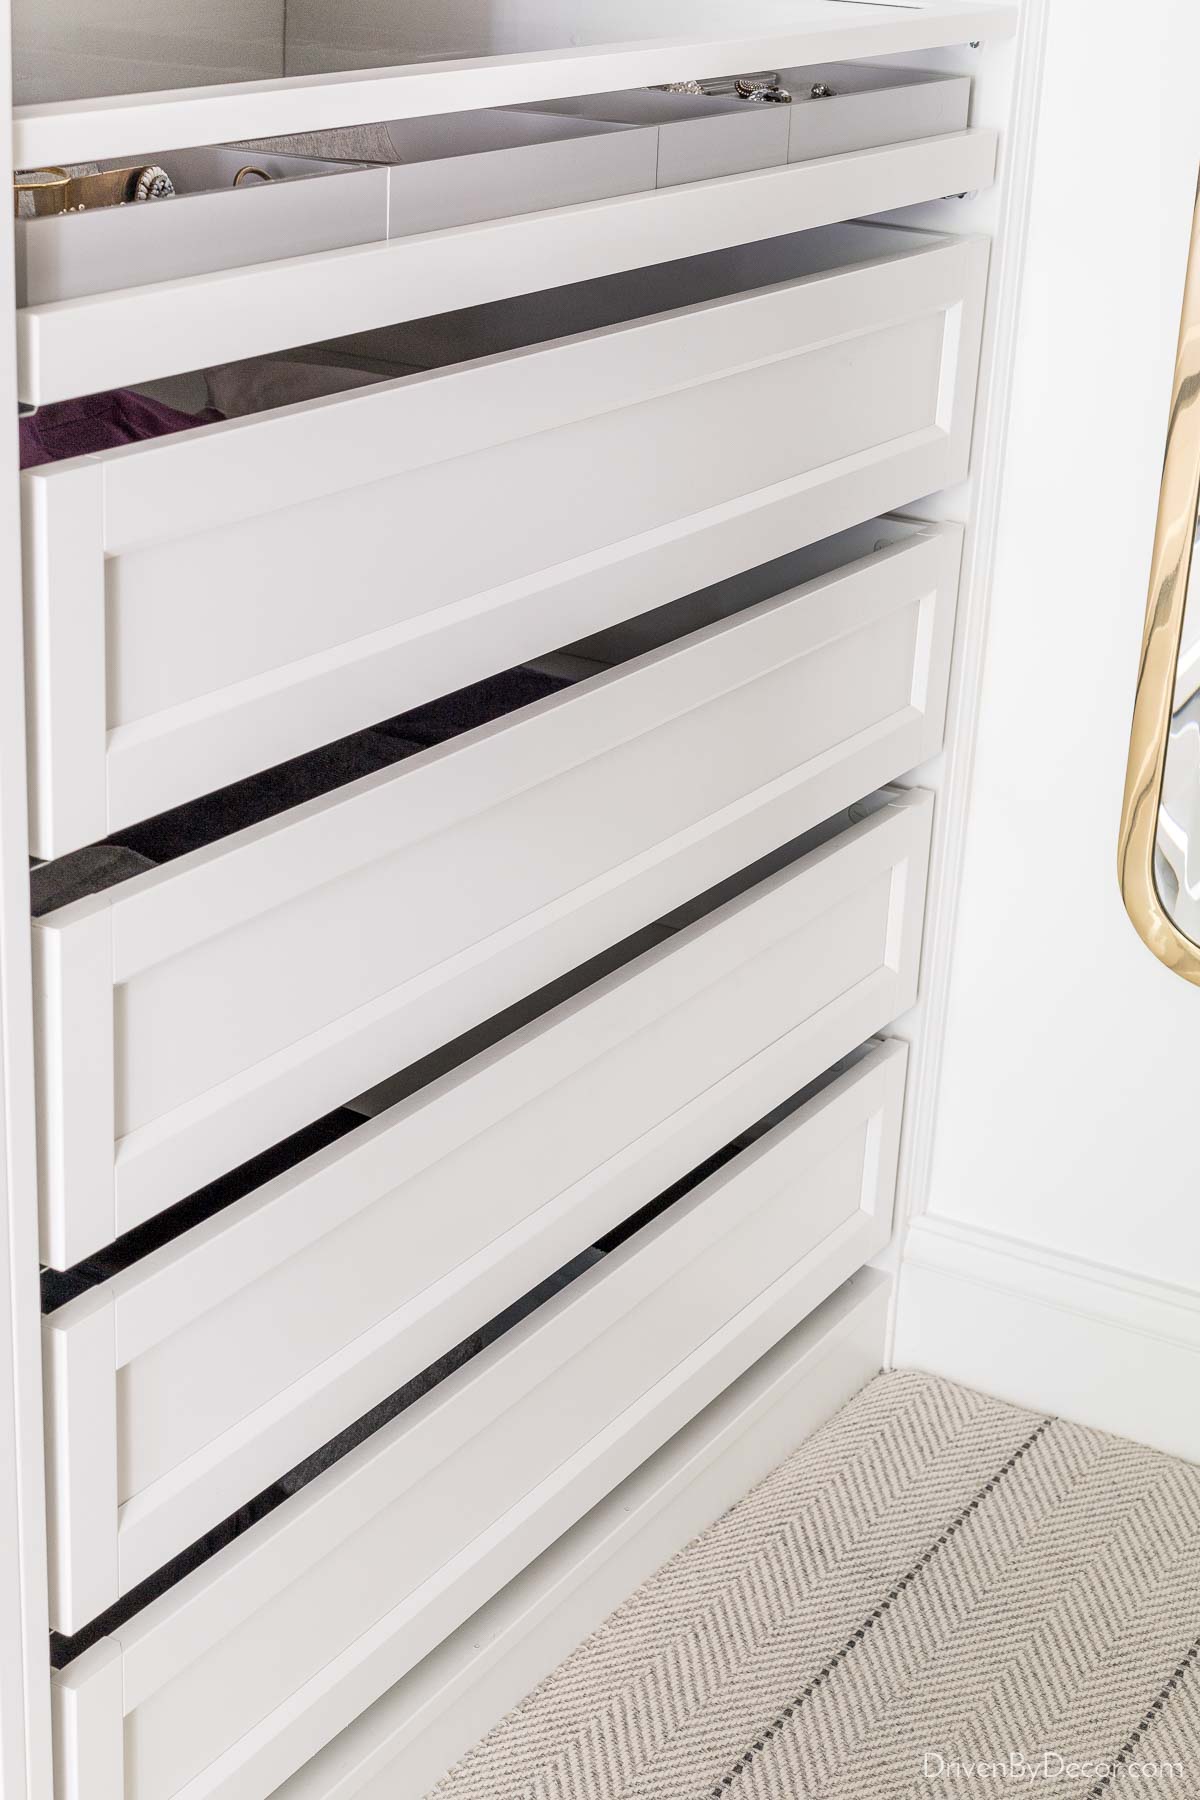
I also like that the Pax drawers are solid (they could be messy as heck inside and you wouldn’t know it) whereas the Elfa drawers are metal mesh:
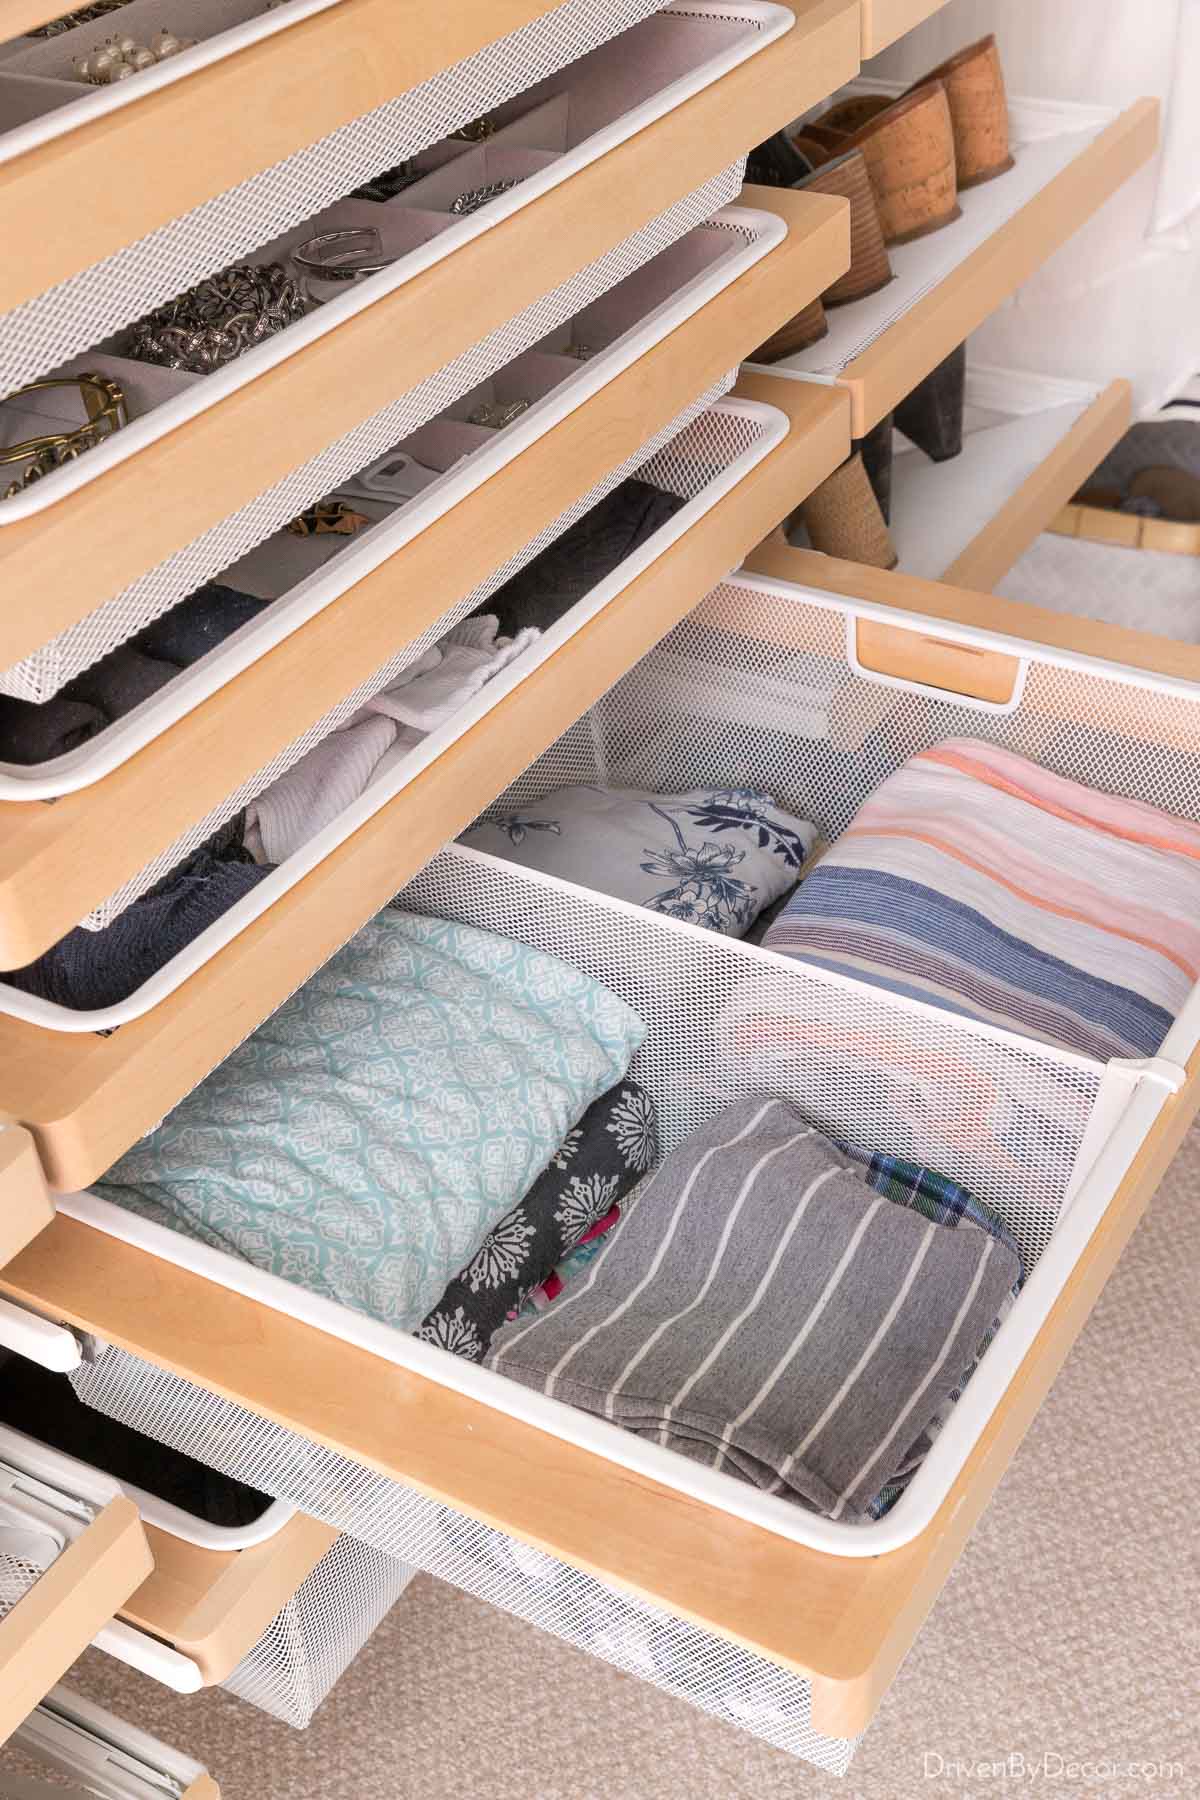
And I prefer how the PAX drawers are squared off along the sides whereas the sides of the Elfa drawers angle in, making it a bit more difficult to stack clothes neatly.
An additional feature of the PAX system that can be a pro or con depending upon the layout of your closet is that the wardrobe frames have backs. The pro is that if your closet walls have ugly wallpaper, a terrible paint color, or are just full of nicks and scratches, wherever the wardrobe frames are placed, the walls will be covered so no prettying up those walls is needed. On the flip side, this could be a negative in some cases such as if you have a wall outlet or a floor vent in your closet that the wardrobe frames would cover.
And lastly but probably most importantly I think that when it’s done right, a finished IKEA PAX closet system has a higher end look than an Elfa system. This is especially true if you add finishing touches like crown molding across the top of the wardrobe frames.
Elfa System
One of the biggest pros of the Elfa system is that it’s insanely flexible. Since the only thing that’s fixed in place is the top track, you can change around, add, or eliminate components easily. So for example, if you put the Elfa System in a baby’s closet based on the best arrangement for their needs at that time, years later you can move the clothing rods up or down, add or eliminate drawers, etc. so their closet can grow with them as their needs change.
One of the reasons we chose the Elfa system for our current closet is for this exact reason. Our long-term plan is to add a smaller second closet for Jeff and I’ll take over this one for my own. At that time, I’ll be able to easily rearrange the layout of the closet components to best fit my needs.
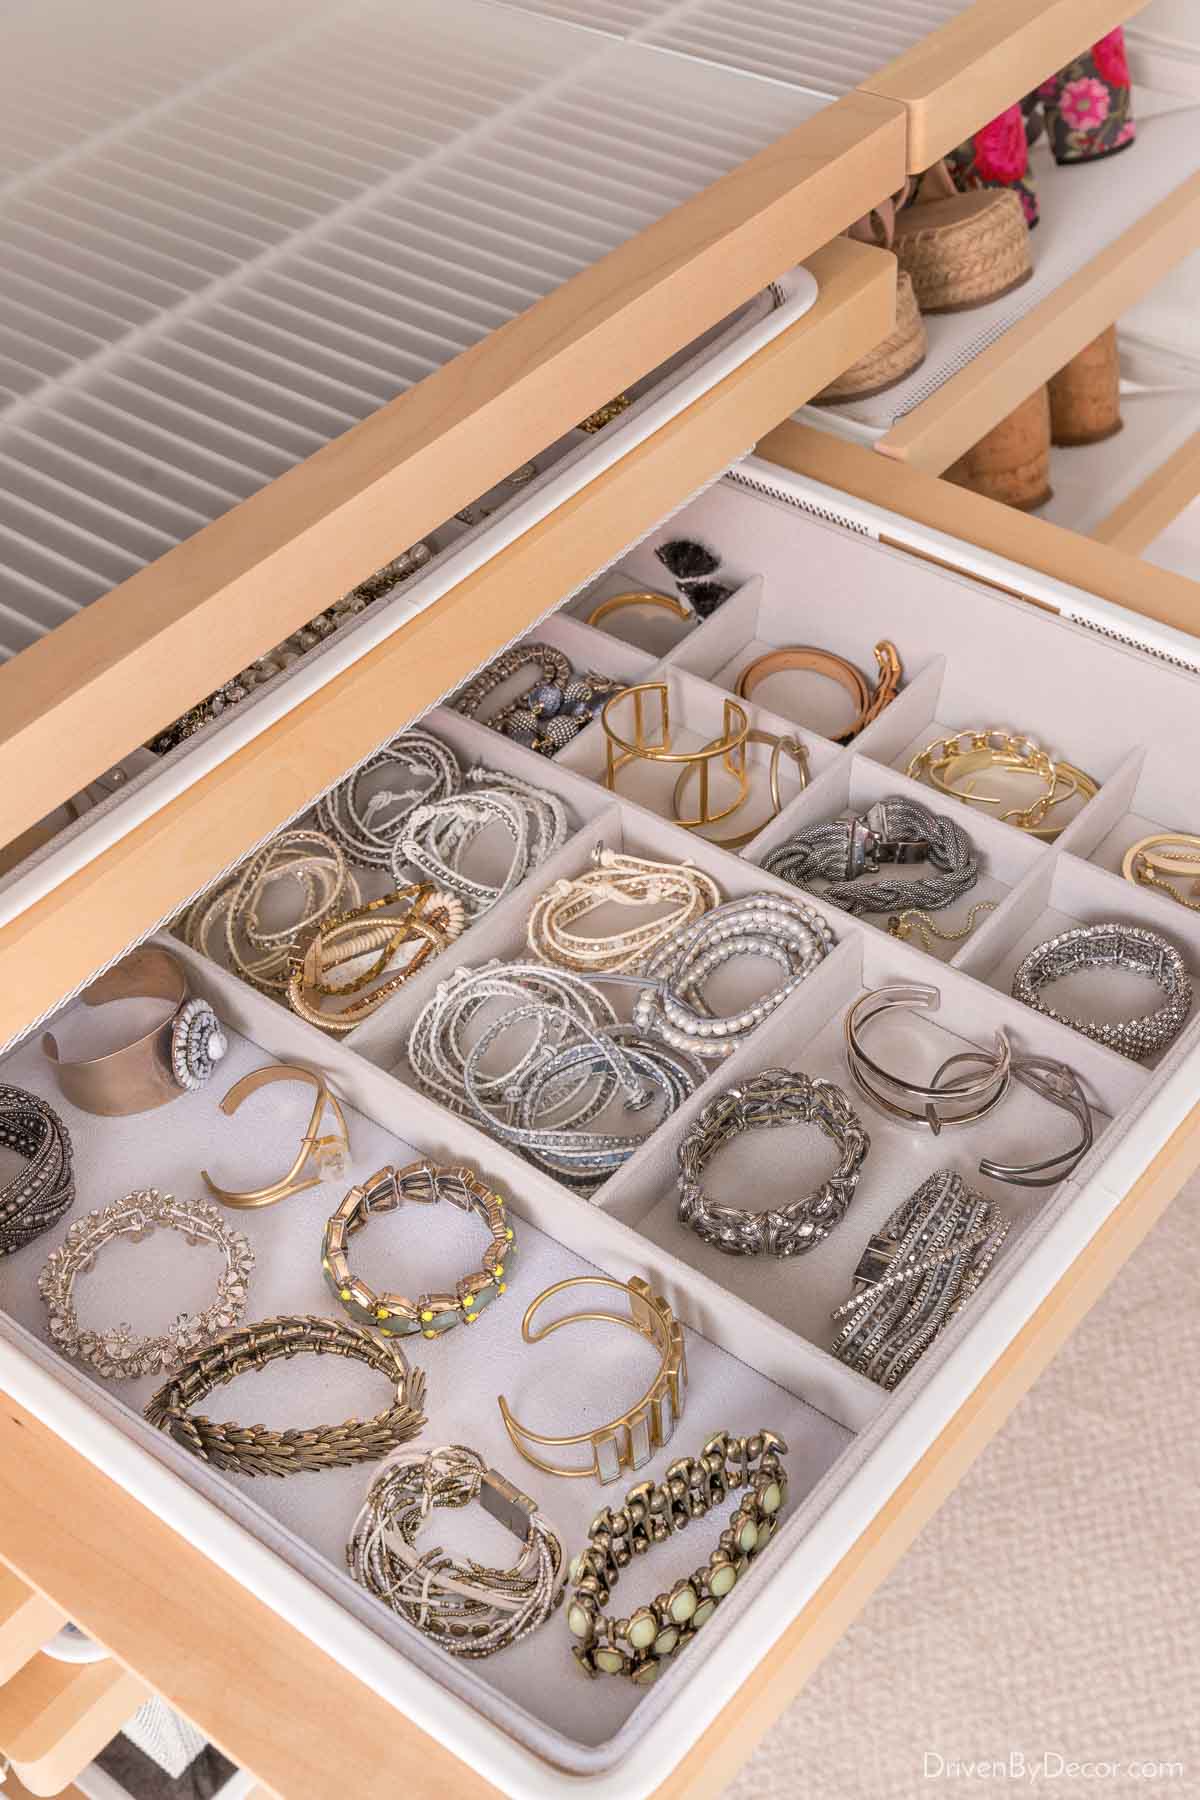
Both the Elfa systems and the PAX system have some great drawer accessory options to choose from. I used three of {these accessory trays} for my jewelry (one for earrings, one for bracelets, and one for necklaces) which worked beautifully:
Another pro of the Elfa system is that you can take full advantage of the entire height of your closet. As mentioned, the Pax system is configured by using a series of wardrobe frames and there are only two height options – 6’7″ and 7’9″. So if the interior of your closet is over 8 feet tall and you want to use all available space, you would need to add custom shelving above the wardrobes. The Elfa system can be tailored to ANY ceiling height, whether short or tall. The fact that we have 9′ ceilings in our closet and we wanted to make use of that height is another reason why we chose Elfa this time around.
Similarly, with Elfa you can take advantage of the entire width of your closet as compared to the PAX wardrobe frames that only come in 3 widths and you need to be able to combine those together to fit the width of your closet. Unless you get lucky or are building the closet from scratch to fit the size of the PAX wardrobes (as in an addition or new home build), there may be some wasted space and/or awkward gaps at the ends. Also the PAX system doesn’t have a very good solution for designing closet corners while the Elfa system does:
One last pro of the Elfa system is that if you’re putting it in an existing closet, you don’t have to remove the closet baseboards. The vertical standards of the Elfa can be cut to end above the baseboard so that your baseboards don’t need to be removed. With the PAX system, in order for the wardrobes to be flat against the wall, you need to either remove the baseboards or install spacers at the top of the wardrobes where they’re attached to the wall to keep the wardrobes the same distance away from the wall as the width of the baseboards so that they’re fully upright.
Both the Elfa and PAX systems have several different options for shoe storage. We chose {these mesh gliding shoe shelves} for our new closet which I have mixed feelings about:
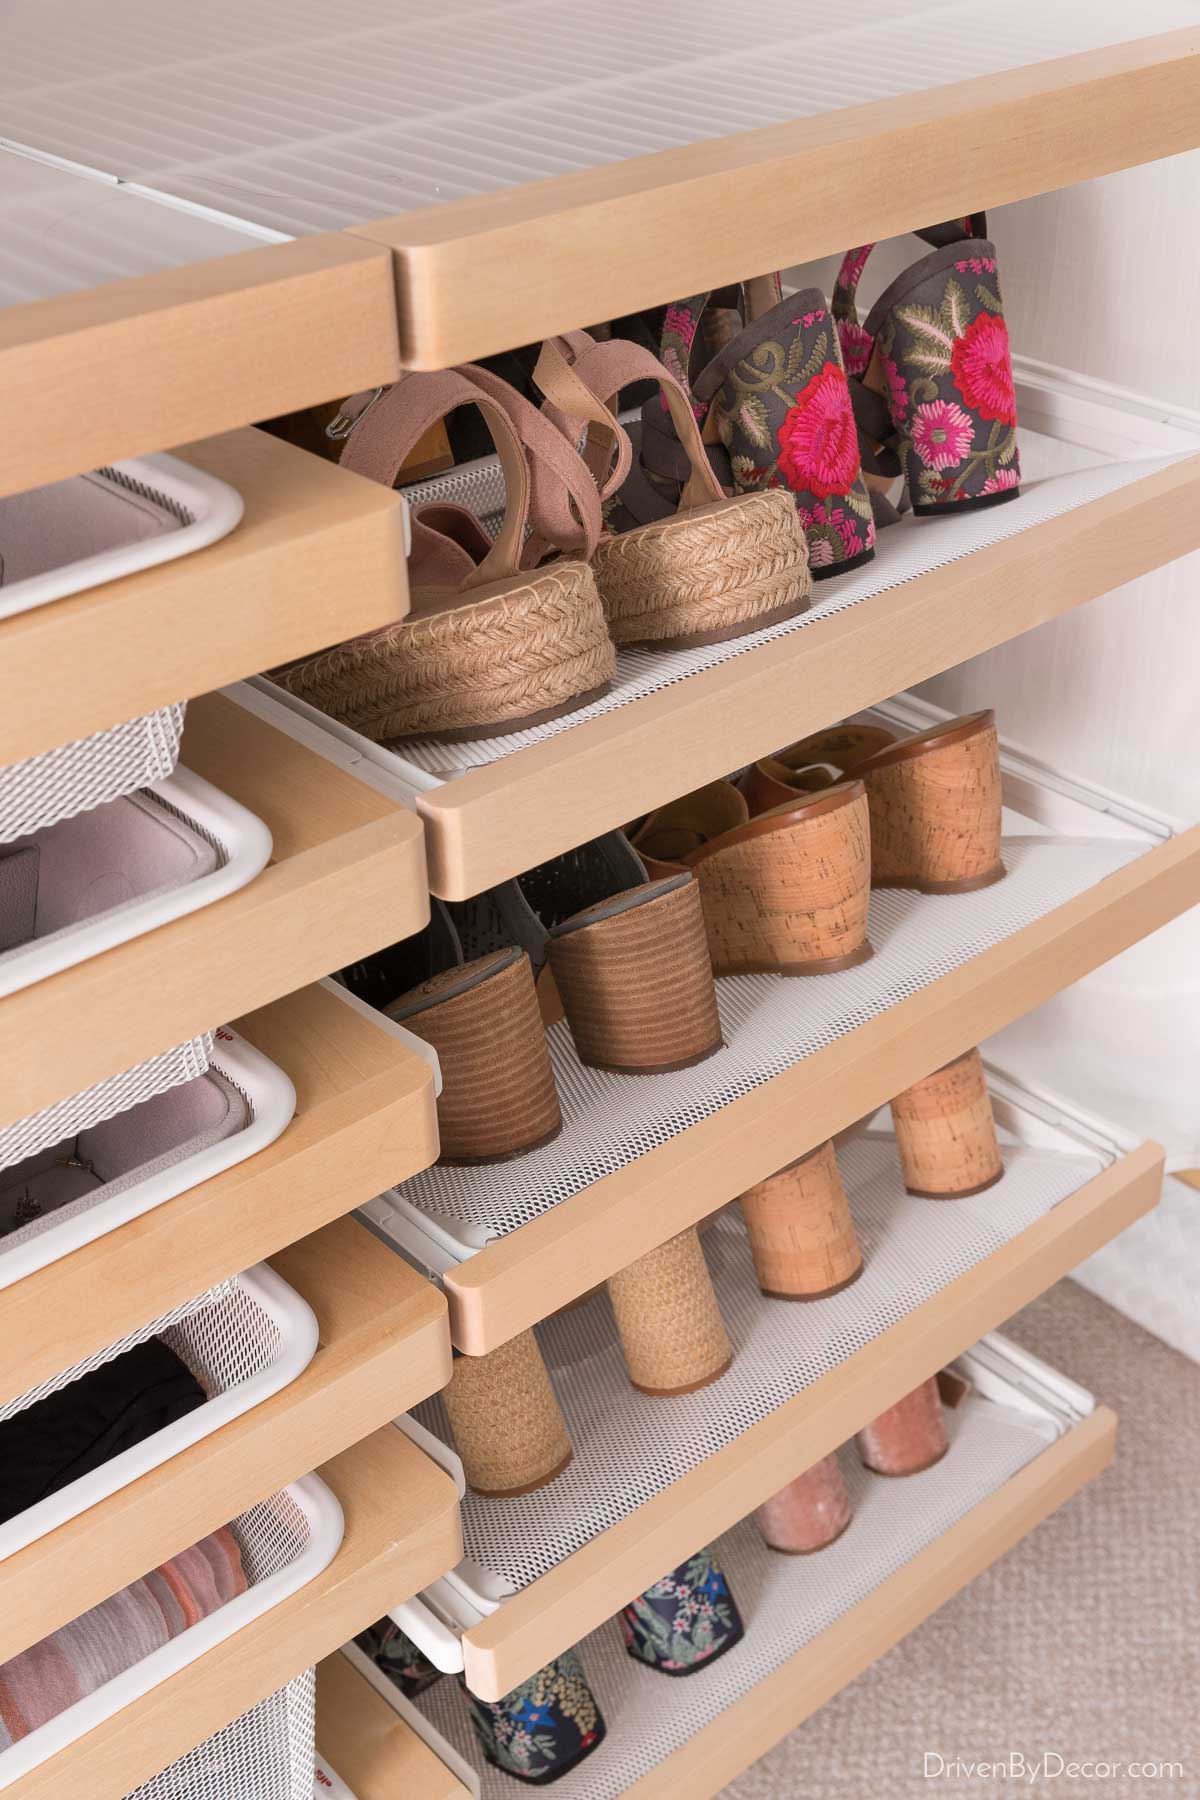
I love how accessible your shoes are with a simple pull out of the shelf:
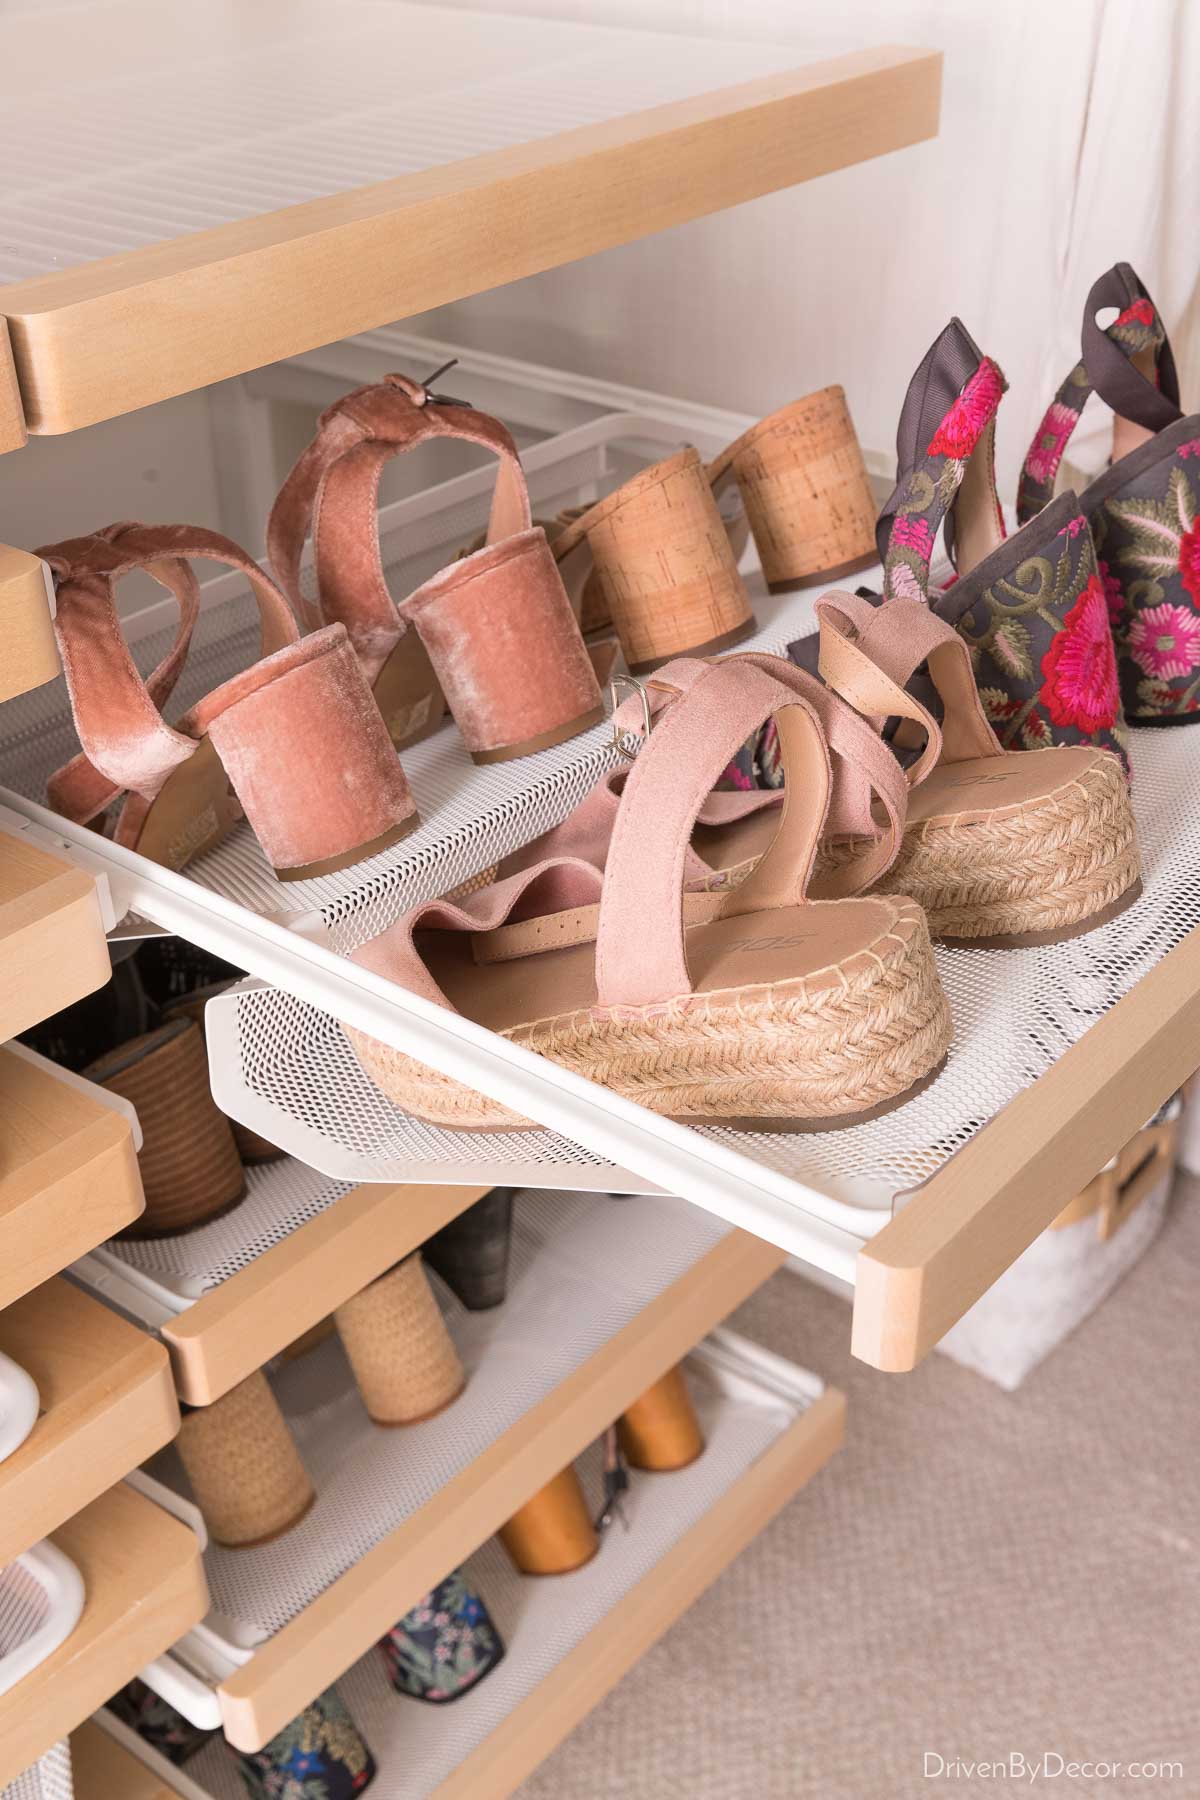
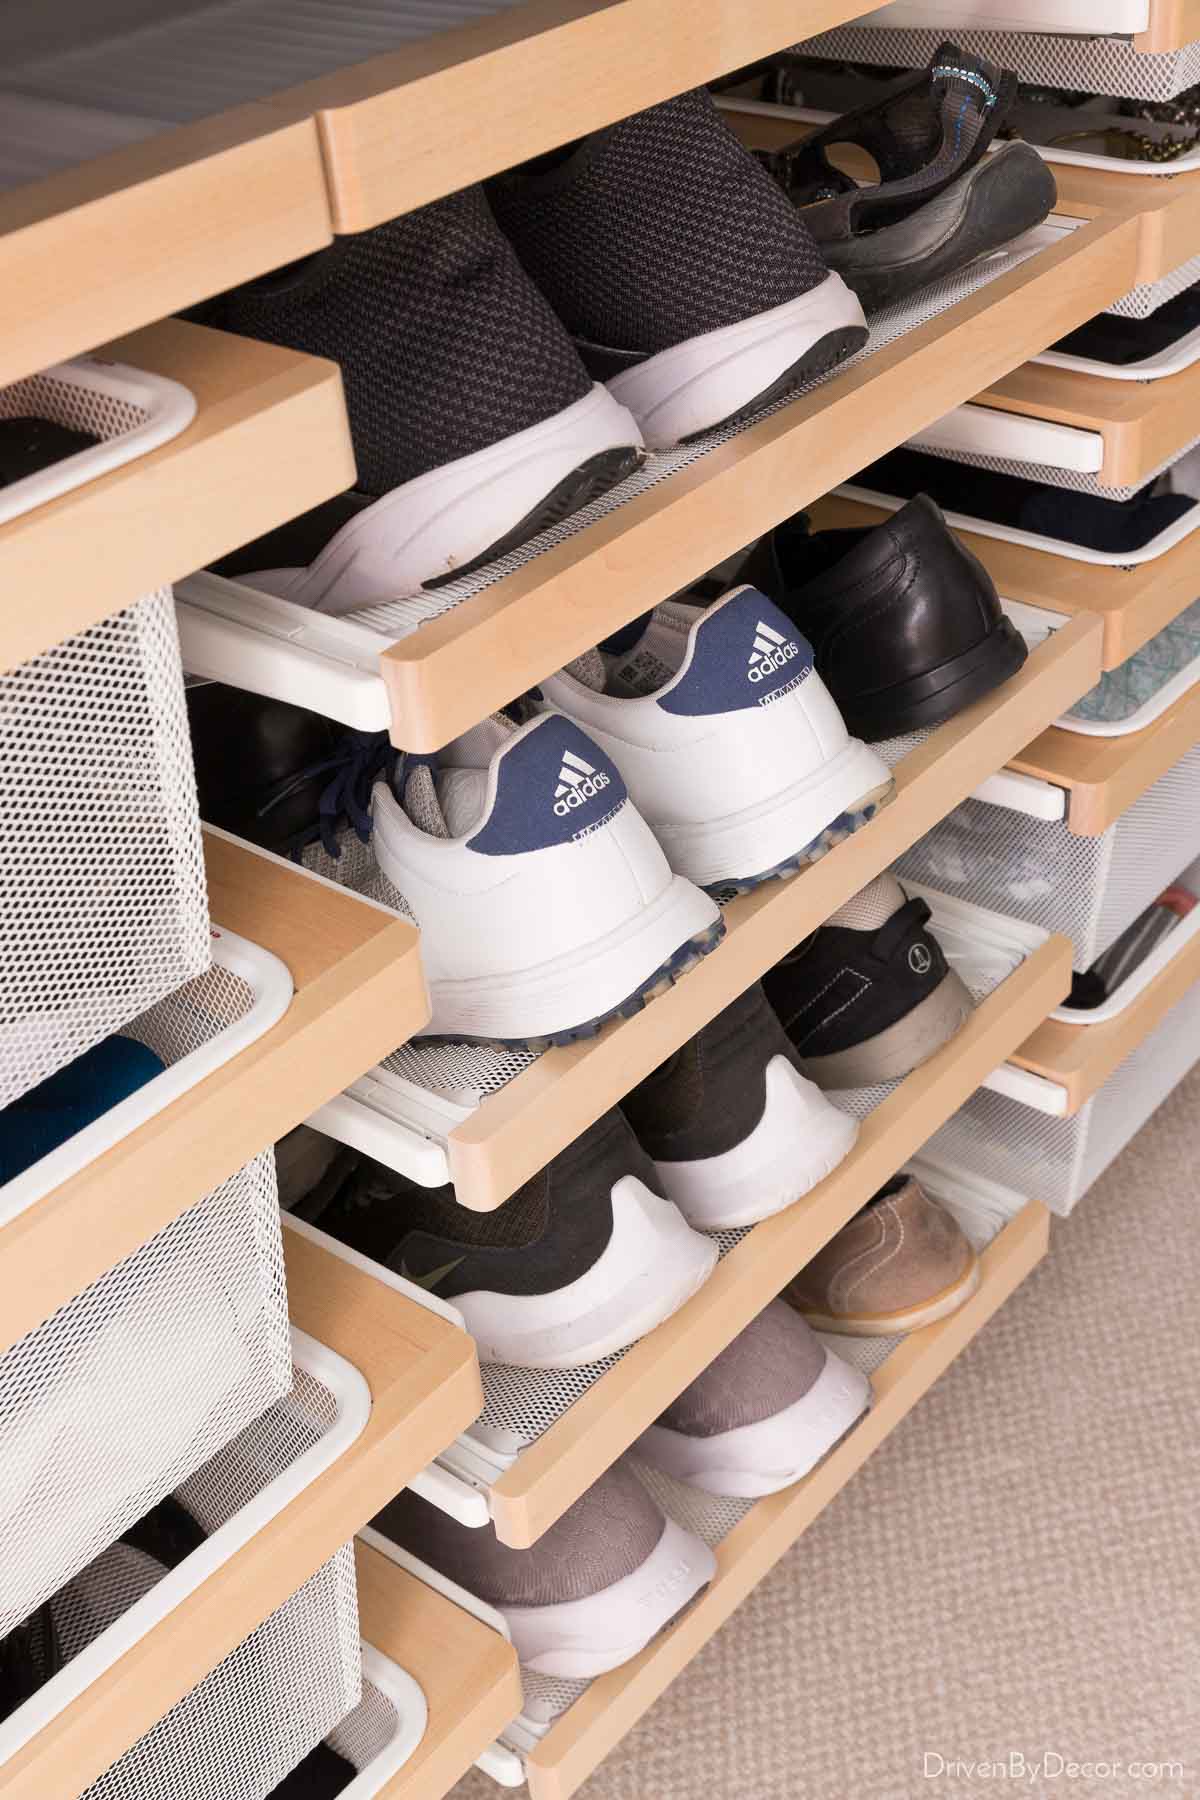
But at the current spacing of our shelves, I can’t put in some of my taller heeled shoes because they get hooked on the shelf above. Removing one of the shoe shelves and spacing out the remaining ones would solve the problem but that’s a lot of space to devote to a small number of shoes. Also, while each 24″ shelf fits four pairs of my shoes, they only fit three pairs of Jeff’s:
You can also use Elfa’s simple gliding shelves to store your shoes (which would allow you to maximize your space). And FYI, if you’re wondering where the heck the rest of my shoes are, I put the pairs of shoes I use the most on the shoe shelves and have the rest in the three floor baskets under our long hanging clothes.
And with that, my closet reveal post is a wrap! If you have any questions that I didn’t answer in my post, be sure to leave them in the comments. And if you want to see the Elfa system in action in a garage, check out my post on garage organization from when we installed an Elfa system in our old house:
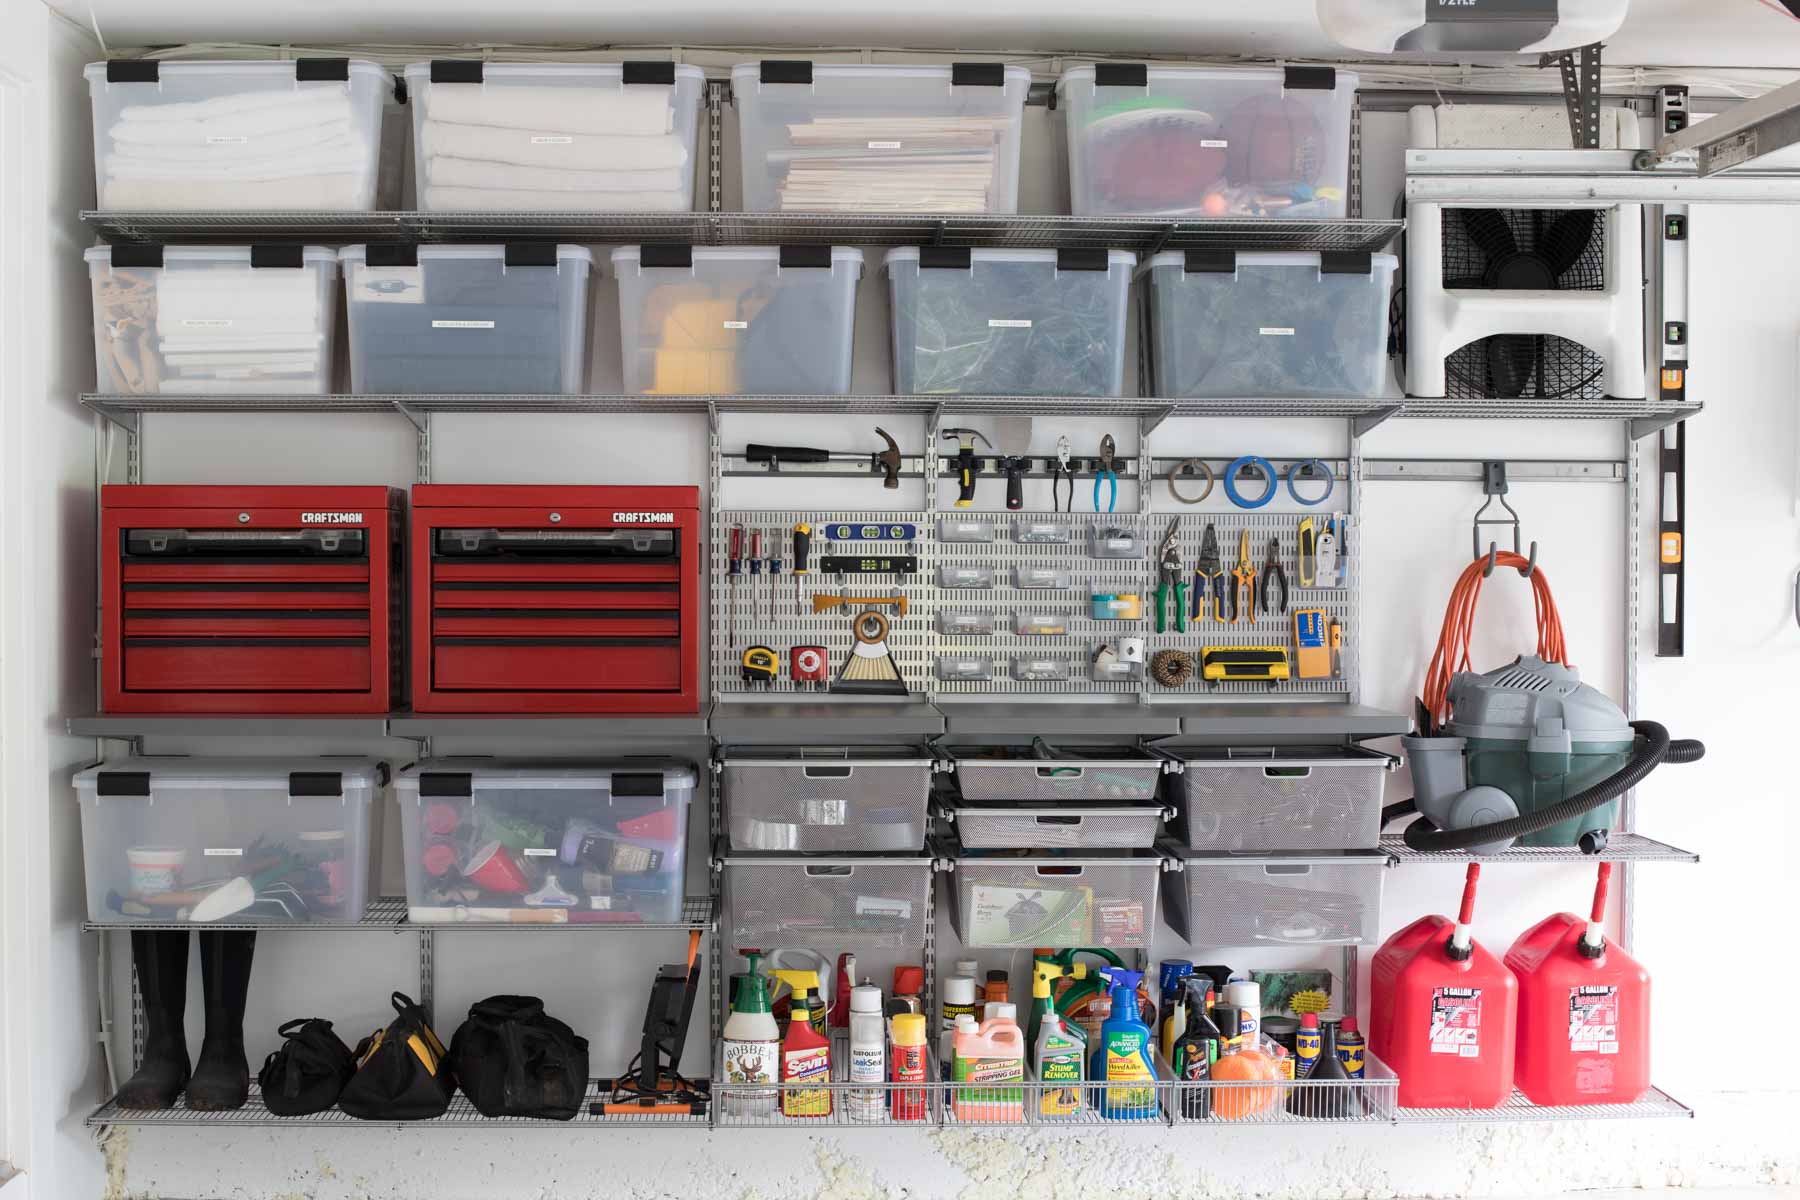
We actually moved a good chunk of this system with us to our new house, ordered some new Elfa components to add onto it, and are finally getting our garage here whipped into shape. I’ll share more about that soon!
Want more inspiration to get your home organized? Check out my post on 20 home organization ideas!
Thanks for stopping by and enjoy the rest of your weekend,


